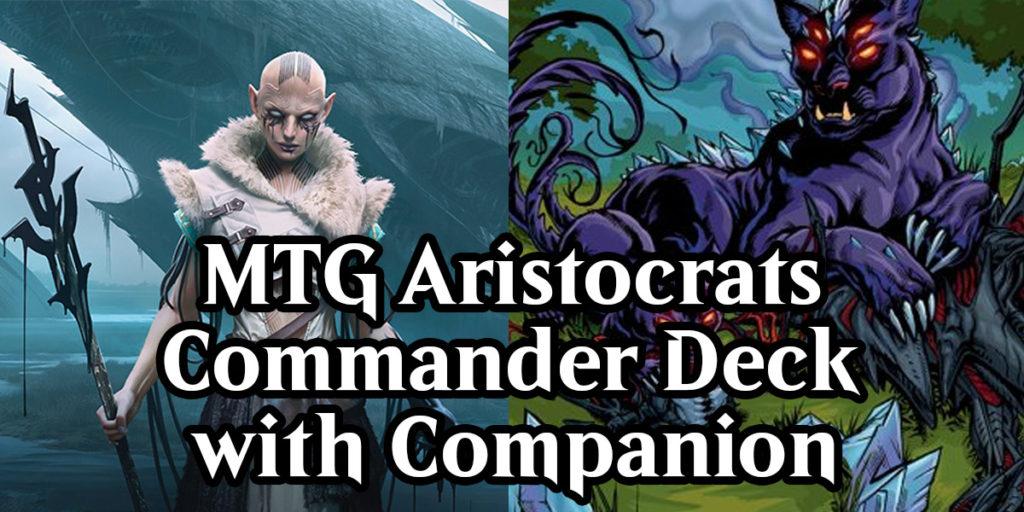
I had a goal to make myself an awesomely themed MTG Aristocrats Commander deck with Lurrus of the Dream-Den as my companion. I know the majority of players hated the companion mechanic, but I absolutely loved it. It is like having a second Commander, except you have to pay to bring it to your hand. Another goal of mine for this Aristocrats deck was for it to be as competitive as possible, within reason.
This is my take on a competitive MTG Aristocrats Commander deck. By utilizing some of the popular Aristocrats MTG has created throughout the years, and packing in some powerful noncreature spells, I have put together a viable deck that is no joke. Follow along as we discuss every single card in this deck, all of its win conditions and general strategies for executing a solid gameplan using this Aristocrats themed deck.
Table of Contents
This post contains affiliate links, which means I may receive a small commission, at zero cost to you, if you make a purchase through a link.
What is an MTG Aristocrats Deck?
If you are already familiar with Aristocrats and the strategies behind an Aristocrats deck, feel free to skip to get to the actual deck breakdown below. In MTG, an Aristocrats deck is all about your creatures dying and you benefiting off of those creatures dying.
A lot of the times, you will actually be sacrificing your creatures to trigger specific effects. The most common effect you will be trying to achieve is causing your opponent(s) to lose a life and for you to gain a life.
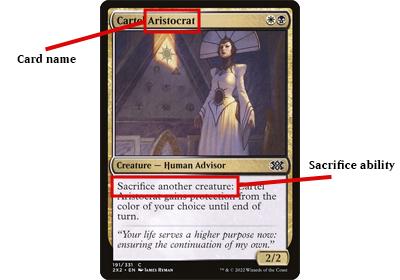
Creatures that have an abilities that require you to sacrifice a creature are what are considered the Aristocrats. For instance, ‘sacrifice a creature: do xyz thing’. The term Aristocrats is derived from the cards Cartel Aristocrat, Indulgent Aristocrat, Vampire Aristocrat and Falkenrath Aristocrat that have these types of abilities and ‘Aristocrat’ as part of their card name. An Aristocrats deck is filled with ways to sacrifice your creatures where you benefit from sacrificing those creatures.
One of the biggest payoffs an Aristocrats deck has is the ability to drain and gain. When your creatures die, or even possibly an opponents’ creatures, you cause each or target player to lose life while you gain life. This is the payoff I have built my Aristocrats deck around. To begin, lets discuss what I feel like is the best Aristocrats commander.
The Best Aristocrats Commander & Companion Duo
First and foremost, this is an extremely in-depth guide for this entire deck, down to a brief explanation of every single card. Feel free to use the Table of Contents above to bounce around or find specific information you are looking for.
The entire foundation of this MTG Aristocrats Commander deck is having Lurrus of the Dream-Den as a companion. If you didn’t know, any companion is considered an extra card in your deck. That means, if you deck qualifies to have a companion, it would be considered card #101.
The stipulation being if you deck qualifies. Running a companion in your deck comes with the disadvantage of specific deck build restrictions outlined on each companion’s card text. With Lurrus, the deck building restrictions are only permanents of 2 mana value and lower are allowed in your deck. Instants and Sorceries can be larger than 2 mana value, however.
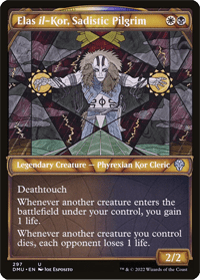
Since Lurrus‘s color identity is black and white, this Aristocrats deck is going to be Orzhov. The icing on top was that Dominaria United gave us Aristocrats players something juicy. That being Elas il-Kor, Sadistic Pilgrim, the chosen Commander of this deck and one of, it not the best Aristocrats Commander MTG has ever printed!
The Full MTG Aristocrats Deck List
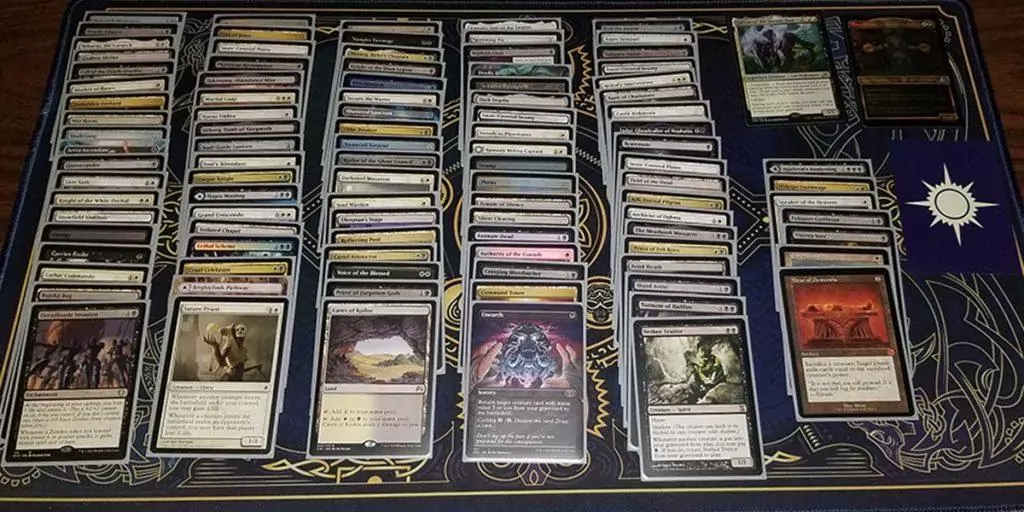
Commander
Companion
Artifacts (4x)
Enchantments (9x)
Instants (10x)
Creatures (36x)
Lands (32x – 34x including MDFC Cards)
My MTG Aristocrats Deck Tech
This is the full breakdown for my MTG Aristocrats deck. Starting off, the deck’s core themes will be discussed. These topics are more generic, such as manabase, ramp, card draw, etc. Following the core themes, more deck-specific themes will be discussed. These will be the Aristocrat type themes like life drain, life gain, among others. Lastly, there is a section for discussing the MTG Aristocrats deck gameplan.
The Full MTG Aristocrats Deck Breakdown
You’ll notice a fair bit of cards included in this MTG Aristocrats deck are dual purpose, in that they serve do multiple things. A good example of this is the card Eiganjo, Seat of the Empire. It is a land, if you need it, but if you don’t need the land, it is also a potential removal spell.
That is by design. I mention in my How to Build a Commander Deck guide that I am a big fan of my cards having multiple purposes. Having cards like this gives you more flexibility when you are limited on the amount of cards you can run (100 or 101 in the case of my MTG Aristocrats Companion Deck).
Core Themes
Manabase
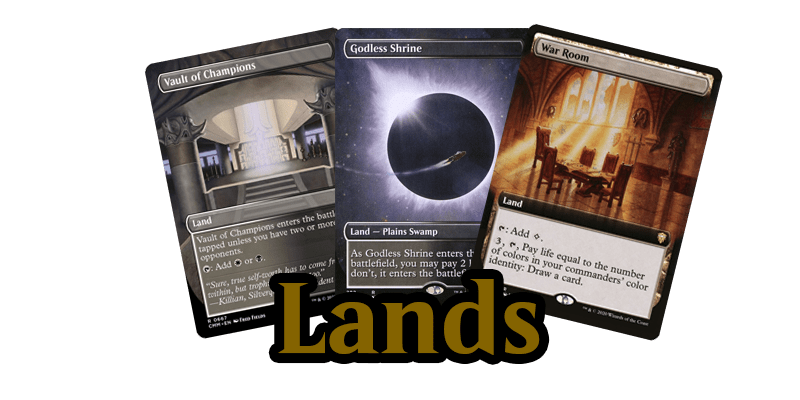
With the land count being as low as it is, there is some argument for removing Dark Depths and Thespian’s Stage from the deck in favor of two dual lands or even two more basic lands. I personally am willing to take the risk and leave them in, as having a 20/20 Indestructible Flying creature is a potential alternate win condition.
If you do opt to replace these lands with other lands, it might be worth removing Vampire Hexmage from the deck. It is really only there for removing the Ice Counters off of Dark Depths and being another death trigger for some good ole fashioned MTG Aristocrats shenanigans.
- 13x lands that can produce white or black
- 1x land that can enter as either white or black (Brightclimb Pathway // Grimclimb Pathway)
- 9x lands that produce black mana
- One of them being Urborg, Tomb of Yawgmoth, which will make all lands on the battlefield a swamp, in addition to their other types
- Two of them being MDFC cards (Hagra Mauling // Hagra Broodpit and Agadeem’s Awakening // Agadeem, the Undercrypt)
- 6x lands that product white mana
- 5x utility lands
For utility lands, there is the Dark Depths/Thespian’s Stage combo mentioned previously. In addition to that, there is War Room which can help draw more cards. Also, Field of the Dead is there to produce more creatures to die for those sweet, sweet death triggers. Lastly, there is Volrath’s Stronghold.
A sub-theme of this deck, as denoted by Lurrus being the companion, is reanimation. If Lurrus, or any other important creature gets removed, you can use Volrath’s Stronghold to put said creature on top of your deck and recast it from your hand when you draw it.
Ramp
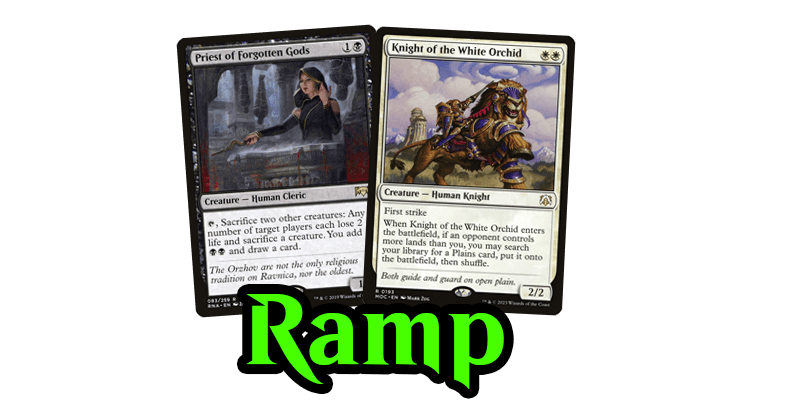
You may have already noticed, but this deck doesn’t run ramp. There isn’t even a Sol-Ring in the deck! This deck doesn’t really have anything ramp towards. The only piece of ramp that exists is Knight of the White Orchid. If you play Knight of the White Orchid and meet the conditions to grab a land from your library, your targets should be either of the dual lands with types.
If you need the mana immediately, grab Godless Shrine from your deck and pay 2 life so it enters the battlefield untapped. If you don’t need the mana this turn, grab the Snowfield Sinkhole which will enter tapped. If Godless Shrine is already in play and you need the white mana immediately, grab a basic Plains.
The only other source of ramp would be Priest of Forgotten Gods. If you can sacrifice two creatures, this card will make each opponent sacrifice a creature, lose 2 life and you will get 2 black mana and draw a card.
Card Draw
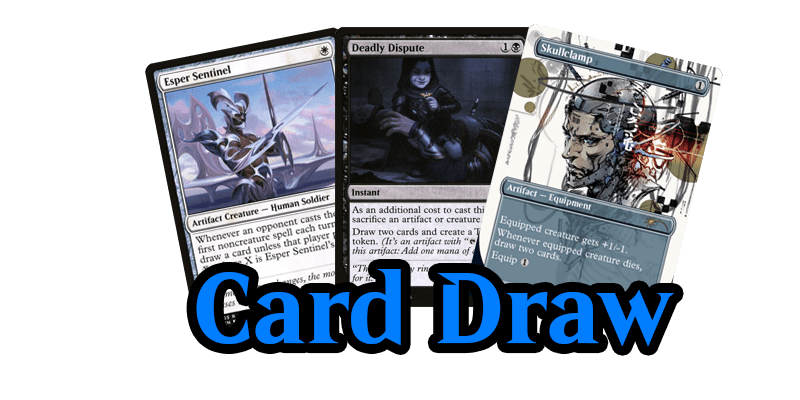
The best source of card draw in this deck is hands down Skullclamp. Play it as soon as you are able to and start clamping your creatures for 2 cards! Another artifact that can draw you a card is Soul-Guide Lantern. I personally would prefer to use its exile each opponents graveyard ability, but if you are desperate for a card, you can use the draw a card ability instead.
There are a few creatures that can draw you cards. Esper Sentinel is probably the second best one. Hopefully you can draw 3+ cards from it before it gets removed. Even if you only get 1 card out of it, for 1 mana, that is not a bad deal. Next would be Priest of Forgotten Gods.
This card will give you sacrificing benefits, ramp, removal, ping opponents for 2 damage and draw you a card. All with its single ability. The deck also runs Archivist of Oghma which will give you a life point and draw you a card every time an opponent searches their library.
Wernog, Rider’s Chaplain is a little different in that it will generate Clue tokens which can then be used to draw cards. Wernog will let you investigate 1 + X when it enter or leaves the battlefield. X is the number of opponents who chose to investigate as well. Those who don’t will lose 1 life.
This deck also runs some other sorts of card draw. Deadly Dispute gives you a treasure token and 2 cards for sacrificing a creature or an artifact. Unearth is one of the reanimate spells, but it also has cycling 2 on it if you are desperate for a card. Warlock Class‘s second level lets you look at the top 3 cards and put one into your hand, and the rest into your graveyard.
Lethal Scheme is the last piece of card draw in this deck. This is a removal spell that has Convoke. For each creature that was Convoked, you get to Connive. Conniving is drawing a card and then discarding a card. If a nonland card is discarded, put a +1/+1 counter on the creature that is Conniving.
If you are desperate for cards (and have at least 1 in your hand), don’t be afraid of firing this spell off on a non-impactful creature. If a non-impactful creature is the only target and you need cards, do it. In an ideal situation, you would use Lethal Scheme to kill a huge threat, but sometimes the cards are more important.
Removal
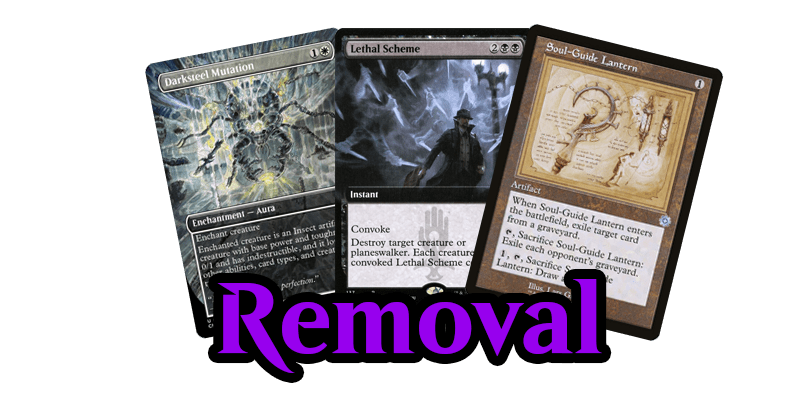
The removal in this deck is pretty versatile. With the right card, you can hit nearly any type of threat. The only threat you can’t really respond to is a powerful land. It may be worth running a copy of Demolition Field in place of one of the other utility lands. Here are the different permanent types you can remove and the cards that can do it:
- Single Creature:
- Multi Creature (Board Wipes):
- Nonland Permanent:
- Planeswalker:
- Artifact:
- Enchantment:
- Graveyard:
- Library (mill):
Control
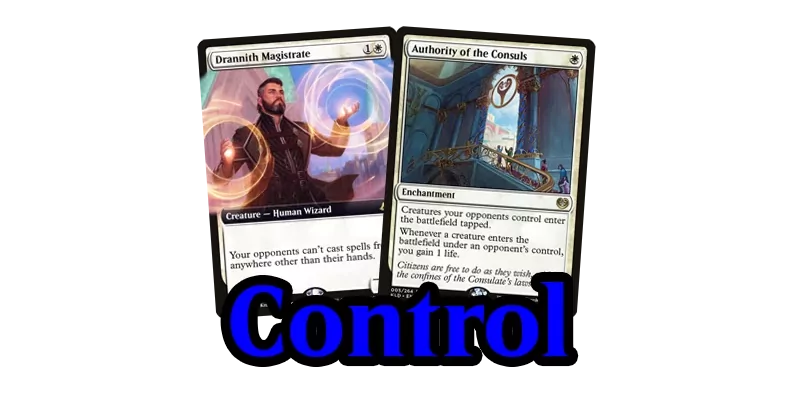
This deck doesn’t have many control elements to it. There are a couple though. Authority of the Consuls is in the deck as a cheap enchantment that will give you life for creatures entering the battlefield under an opponent’s control. The control aspect comes from its first ability, opponents’ creatures enter the battlefield tapped.
The second control piece is Drannith Magistrate. This is a dirty card lol. It stops your opponents from casting their spells from anywhere except from their hands. Ergo, they can’t cast their commanders while Drannith Magistrate is on the battlefield since their commanders are in the Command Zone, not in their hand.
This card is also great in the fact that it stops so many decks from functioning. So Drannith Magistrate will be a magnet for removal, hopefully leaving some of your other threats alone.
MTG Aristocrats Deck-Specific Themes
The Bread and Butter of My MTG Aristocrats Deck – Life Drain/Death Triggers
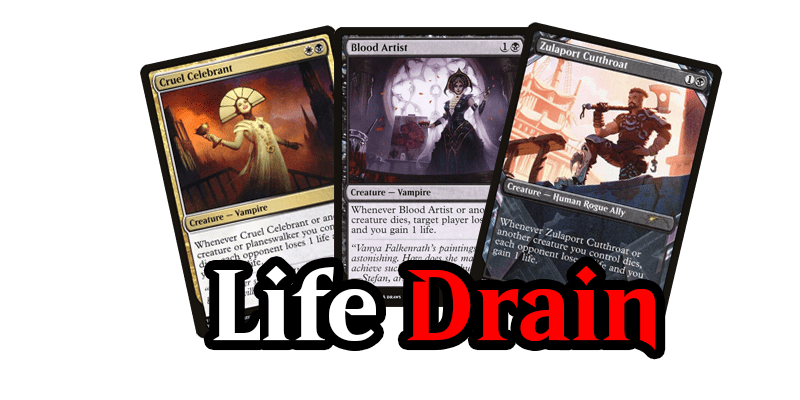
This deck will mainly win by draining your opponents of their life, one-by-one, as each creature dies. The entire premise of this deck is to get creatures out and sacrifice them to take advantage of the deaths by triggering other permanents’ death triggers.
The commander of this deck has a death trigger that will damage each opponent 1 life for every other creature that you control that dies. Cruel Celebrant and Zulaport Cutthroat also have this ability. The Meathook Massacre will also see any of your creatures dying and deal 1 damage to each opponent.
Blood Artist is similar but also different. Blood Artist will trigger any time any creature dies, not just your own. But it will only damage a single target player. Warlock Class will hit each opponent at the beginning of your end step if any creature died that turn. Its level 3 ability, while very expensive, is punishing. At the beginning of your end step, each opponent will lose life equal the amount of life they already lost that turn.
Creeping Bloodsucker will trigger at the beginning of your upkeep and deal 1 damage to each opponent, while gaining you life equal to the damage dealt that way.
If you active the ability of Priest of Forgotten Gods, each opponent will lose 2 life, in addition to having to sacrifice one of their creatures.
Another way you will be draining your opponents is by damaging them for 1 life for each creature that enters the battlefield. Both Corpse Knight and Suture Priest fall into this category. Corpse Knight will trigger when your creatures enter the battlefield and deal 1 damage to each opponent for each creature. While Suture Priest will trigger when an opponent has a creature enter the battlefield, but only dealing 1 damage to that opponent, not all of them.
If you’re in the late game, or have a good amount of mana, casting Torment of Hailfire will be a crushing blow to your opponents. They will either have to start discarding, sacrificing nonland permanents, or lose 3 life for each instance of X. This can be a game ender.
The last card to discuss in regards to life drain is Vizkopa Guildmage. For just 1 generic, 1 white and 1 black, you can have each opponent lose life equal to the amount of life you gain for a whole turn. If you gain 4 life from a lifelink creature, 3 life from another lifelink creature, and gain 1 life from a creature entering the battlefield under your control, each opponent will lose 4 life, then 3 life and final 1 more life. Activating this ability under the right circumstances can lead to a huge swing in life totals.
Life gain
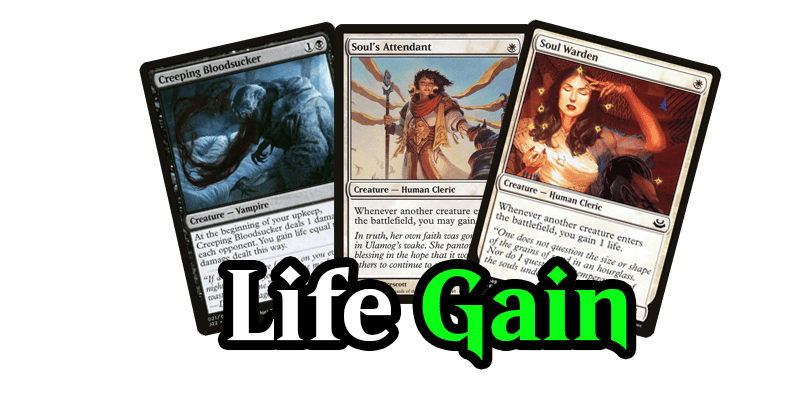
There are tons of ways to gain life in this deck. For starters, the commander gives you 1 life every time a creature enters the battlefield. Other creatures that grant this effect are:
- Soul’s Attendant (opponents’ creatures too)
- Soul Warden (opponents’ creatures too)
- Suture Priest
In addition to the two list above, Authority of the Consuls will give you 1 life every time a creature enters the battlefield under an opponent’s control. The Meathook Massacre will give you 1 life every time a creature an opponent controls dies. In a similar vein, these creatures will drain your opponents while giving you life:
- Blood Artist (any creature dies)
- Creeping Bloodsucker (beginning of your upkeep)
- Cruel Celebrant (creature you controls dies)
- Zulaport Cutthroat (creature you controls dies)
Vizkopa Guildmage has an ability where you can give a creature lifelink. On top of that, there are also a handful of creatures that have lifelink outright:
If you are in need of life, Heliod’s Intervention is an X spell can gain you life equal to twice the amount of X. The deck also runs Ayli, Eternal Pilgrim which allows you to pay 1 and sacrifice a creature. You will gain life equal to the sacrificed creature’s toughness. There is also the Extort ability on Tithe Drinker.
This lets you pay either 1 white or 1 black every time to you cast a spell. If you do, each opponent loses life and you gain life equal to the total amount lost that way. So if you Extort a spell and have 3 opponents, each one of them loses 1 life and you gain 3.
Sacrifice Outlets
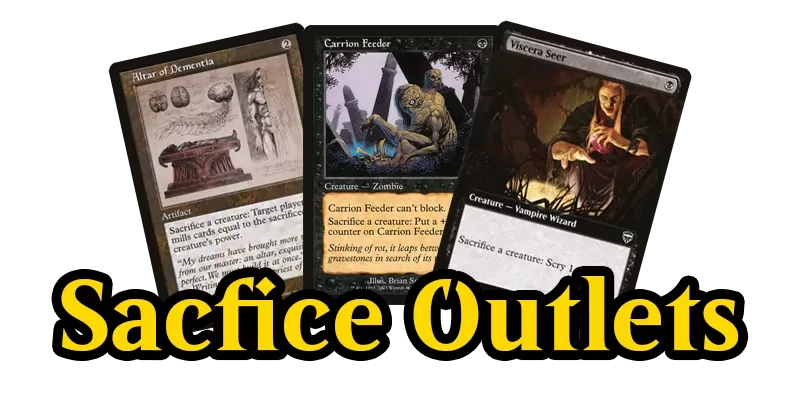
Having the ability to sacrifice a creature on demand is critical for this deck to do what it wants to do. There are 9 sacrifice outlets built into this deck. The best sacrifice outlets are going to be your cards that let you sacrifice a creature at instant speed and preferably with no cost. These are the free sacrifice outlets in this deck:
- Altar of Dementia
- Carrion Feeder
- Cartel Aristocrat
- Spawning Pit
- Viscera Seer
- Priest of Forgotten Gods (must tap Priest of Forgotten Gods but should probably be done at sorcery speed unless you have an instant to use with the 2 extra black mana the ability will give you)
While these are probably your best targets to sacrifice a creature, there are a couple more. They do come with a cost to sacrifice, but are still worthy. Ayli, Eternal Pilgrim will allow you sacrifice a creature, but you must pay 1 to do it. Deadly Dispute is 2 mana instant that requires you to sacrifice a creature or an arctic. It is another excellent sacrifice outlet, albeit a one-time use, most of the time.
The last sacrifice outlet is a little bit on the cheese side. That would be Skullclamp. I know, I know, it is not technically sacrificing a creature, just killing it. But if you have 1/1 creatures available, you can pay 1 to equip Skullclamp and achieve the same result as if that creature were sacrificed. Plus you get to draw 2 cards! It goes on the list 😉
Reanimate
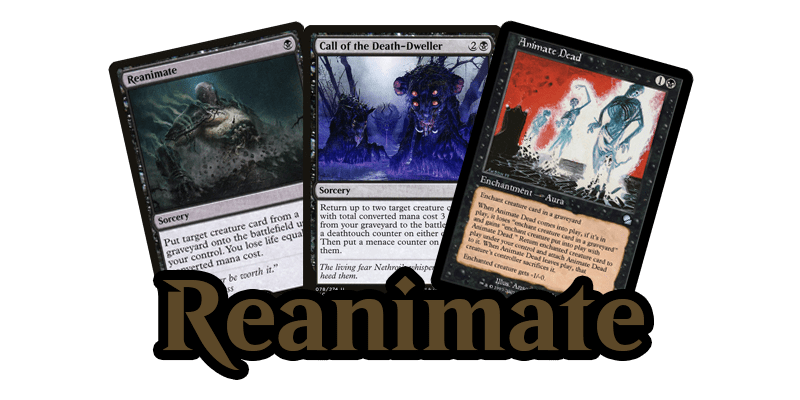
As mentioned before the sub-theme of this deck is reanimate. This deck packs a lot of ways to return permanents (mostly creatures) back to the battlefield after they go to the graveyard. The companion, Lurrus of the Dream-Den, is the embodiment of that. Lurrus lets you cast any one permanent from your graveyard per turn; anything you want! Because of this, Lurrus will usually be the target for your other reanimate cards.
If there is a creature you want that is in an opponent’s graveyard, you have the means to get that creature. Animate Dead and Reanimate can get any creature from any graveyard, not just your own graveyard.
There are four ways to reanimate creatures from your graveyard, not include the two mentioned above. Unearth and Priest of Fell Rites can grab a single creature. Agadeem’s Awakening and Call of the Death-Dweller can target multiple creatures at once.
Gravecrawler can be recast from the graveyard, provided you control a Zombie. There are only two other Zombies in the deck, but we have a three other ways to create Zombie tokens. Jadar, Ghoulcaller of Nephalia, Dreadhorde Invasion and Field of the Dead. Similarly, Nether Traitor can be brought back from the graveyard for a single black mana whenever any other creature dies (tokens dying counts).
Finally we have the last set of cards. While technically these are not reanimate abilities, these will take cards out of your graveyard and put them into your hand, or in Volrath’s Stronghold‘s case, put the chosen card on top of your library. Takenuma, Abandoned Mire‘s channel ability and Phyrexian Reclamation‘s ability put the chosen card into your hand.
Token Generators
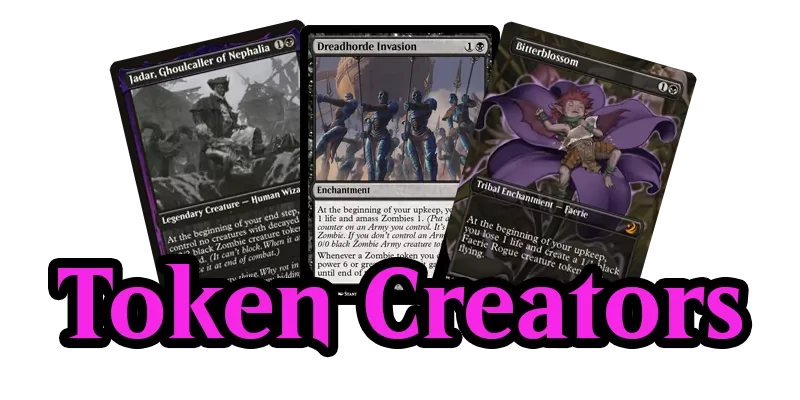
Another sub-theme of this deck is token generation, call it a sub-sub-theme. Being able to always have creatures on the battlefield that you can sacrifice is key and tokens can greatly assist with that. There are quite a few token generators in this deck.
Starting off with the token generators that make a token each turn. This includes Jadar, Ghoulcaller of Nephalia and Hanweir Militia Captain (when flipped) which will both create a token during your endstep. Then there is Dreadhorde Invasion and Bitterblossom. Both of these will create a creature during your upkeep. Make sure you can sacrifice or kill the Zombie Army token each turn so Dreadhorde Invasion makes a new one instead of adding a counter to an existing one.
Then you have cards that have token generating abilities. First is Spawning Pit, which lets you sacrifice a creature to add a Charge Counter on it. At any time, you can pay 1 mana and remove 2 Charge Counters to get a 2/2 Spawn artifact creature token onto the battlefield.
Next you have Speaker of the Heavens which lets you tap it to create an Angel token, provided you have 7+ more life than your starting total. Finally, there is Castle Ardenvale which gives you the ability to create a 1/1 if you have no cards in hand or are in a tough situation and need a creature on the spot.
To round out the token generators are the Instants and Sorceries. These three spells let you sink as much mana as you want into them and create X amount of tokens. Secure the Wastes is at instant speed as is Grand Crescendo.
Grand Crescendo also gives your creatures Indestructible until end of turn, so it acts as protection as well. You probably don’t care if your creatures die, but it is nice to have the ability on the chance you do care. Finally there is Martial Coup. This also acts as a removal if X is large enough.
Protection
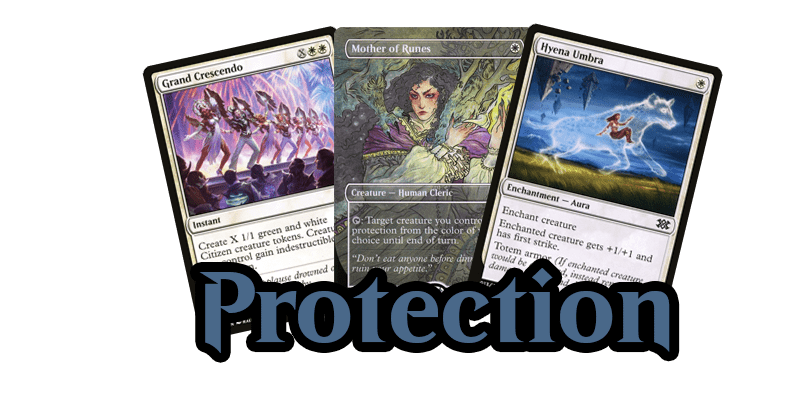
Hyena Umbra is an enchantment with Totem Armor that will most times wants to be attached onto Lurrus. Totem Armor says that if enchanted creature would be destroyed, instead remove all damage from it and destroy this Aura.
Mother of Runes allows us to tap it and give target creature we control protection for any one color until the end of the turn. Similarly, Cartel Aristocrat can also grant this by instead sacrificing a creature.
Grand Crescendo is mainly going to be used as a token generator. But it does have the second ability to grant all of your creatures Indestructible until the end of the turn. Most times, this MTG Aristocrats deck doesn’t care about our creatures dying (in fact, that is what we want!). But there are one-off scenarios where we may want to protect our creatures and Grand Crescendo can help with that.
Tutors
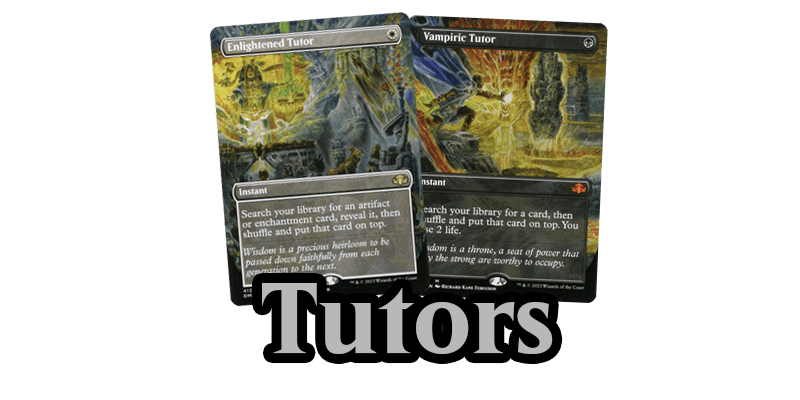
This deck runs both Enlightened Tutor and Vampiric Tutor. The reason I added both of these cards to this MTG Aristocrats Companion deck was to be able to grab a Skullclamp. Having Skullclamp available, you are essentially able pay 1 mana to equip it and be able to draw 2 cards and get a death trigger. That is absolutely absurd. You should have no problems having 1/1 creatures on the battlefield to murder with Skullclamp and reap the rewards.
If you already have a Skullclamp on the battlefield or in your hand, other good targets for these tutors would be your token generators or one of your sacrifice outlets. Obviously, if you are in a pinch or able to win with a specific card, you can tutor up whatever you need or whatever the current situation dictates.
Alternate Win Conditions
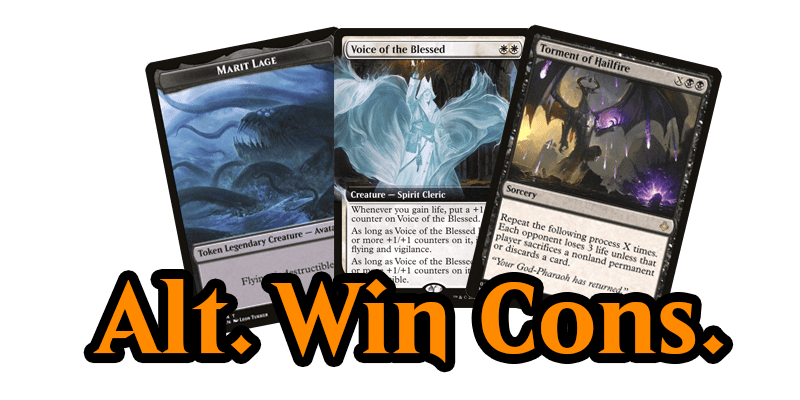
The main win condition of this deck is the usual Aristocrats strategy of pinging your opponents with death triggers from your creatures dying. But there are a few backup plans built in. The first being the aforementioned 20/20 Marit Lage token from Dark Depths.
The next alternate win condition is potentially Voice of the Blessed. If it has enough counters on it, not only does it have a lot of power/toughness, but it will have Flying and Indestructible too. Gaining life in this deck is easy, so your Voice of the Blessed should grow big pretty quickly. It being able to fly means you could take a healthy chunk of life from a player who can’t block flyers.
The final alternate win condition is going to be using Torment of Hailfire as a finisher. If you sink enough mana into its X cost, your opponents will either die or have no resources left to defend themselves, both on the battlefield and in their hand.
The MTG Aristocrats Deck Gameplan
This is the actual deck’s strategy by how it should (ideally) play out. This will go over each stage of the game, from the opening hand all the way to the late game. Essentially, this the gameplan for how you will want to play this deck. Let’s start off with the opening hand and deciding whether to mulligan or keep.
Opening Hand
The biggest worry with this deck is not having enough lands in your opening hand. The land count is pretty low, sitting at 34, two of which are MDFC cards with lands on the back. But the reason for the low land count is that our deck’s average mana value is only 1.76. If your opening hand has at least two lands, with at least one tapping for either black or white, you will want to keep it.
In fact, that is what you should strive for. Since all permanents in this deck are 2 mana value or less, it will be tough to draw a hand that doesn’t have any plays for the first few turns. Mulligan until you have a comfortable manabase and go from there. 5 card starting hands are not the end of the world with this deck.
Early Game
The early game should be all about getting your commander out, hopefully on turn 2. After that, you will want to try and establish a way to be able continue to draw cards. Hopefully you have a means to draw cards by turn 3 or 4. The best card to be on the lookout for would be Skullclamp.
The next priority is building your boardstate. All of the creatures in this deck are 1-2 mana value and there are a lot of them. With any sort of luck, some of the creatures you play will have your life drain death triggers on them. This includes your commander and all cards listed in the life drain/death triggers section.
You want to take advantage of any chip damage you can inflict by attacking with your low powered creatures early while there are no blockers. As the game progresses, your chances to freely attack diminish since most of the creatures in this deck can’t push through blockers.
Mid Game
If you were unable to establish a way to draw cards in the early game, this should be the number one priority. The biggest weakness with this deck is playing out all of the cards from your hand and having nothing left since most everything is so cheap to cast.
The next priority would be to find at least one of the sacrifice outlets and get it into play. Skullclamp can work in a pinch to achieve this (and if you have it). But you really want one of the free sacrifice outlets available to you. This will allow you to sacrifice a creature at instant speed and respond to someone else’s spells.
After that, start trying to get some token generators on the battlefield so you have fresh bodies each turn (or a ton all at once) that can be sacrifice fodder. The more bodies you have, the more damage you can inflict when they die.
If you have a reliable way to continuously make tokens or if you have a few of the Aristocrat creatures out, start attacking with some creatures. Some of the attacking creatures will probably be blocked and killed, but you can either let them die, or sacrifice the blocked ones and start benefiting from their abilities. All while inflicting damage on to your opponents from each creature’s death trigger.
If you are unable to get any sort of card draw sources and are looking for plays, bring Lurrus into your hand and cast it when you are able to. This will allow you to start casting one nonland permanent from your graveyard per turn.
Late Game
Time to wrap it up. If you have Torment of Hailfire, cast it for as much mana as you have available before combat. Even if it doesn’t end up damaging an opponent, they will have to sacrifice permanents and/or discard cards from their hand. This might free up more empty lanes for your attackers to get through for damage.
Hopefully your board is filled with creatures and you have multiple life drain effects in play. If so, it might be a good idea to cast a boardwipe. First, attack with everything not critical (AKA, your Aristocrat creatures) and you may get a few extra points of damage. Then throw down the boardwipe and get death triggers for each creature that dies to it.
Alternatively, just sacrifice your creatures after combat if you don’t have a boardwipe in your hand.
Think about if you have 10 creatures out, 3 of which have life drain effects. You could potentially be dealing 25+ damage to each opponent just on death triggers alone. Now imagine if you had The Meathook Massacre on the battlefield too. Meathook would add an additional 10 damage to each opponent from its ability making a total of 35+ damage from creature death triggers.
Wrap Up
I realize this is a pretty long write-up. If you read all of it, first and foremost, thank you. You are a trooper. Even if you didn’t read all of it, I hope you found some useful information about my MTG Aristocrats Companion deck. This is a very fun deck to play and can be a little challenging keeping up with all the triggers. It has definitely helped me get better at remember my triggers and making sure to try and not miss any.
Elas il-Kor, Sadistic Pilgrim artwork was done by G-host Lee from Dominaria United.
Lurrus of the Dream-Den artwork was done by Steve Ellis from March of the Machine: Multiverse Legends.
You May Also Enjoy



Leave a Reply