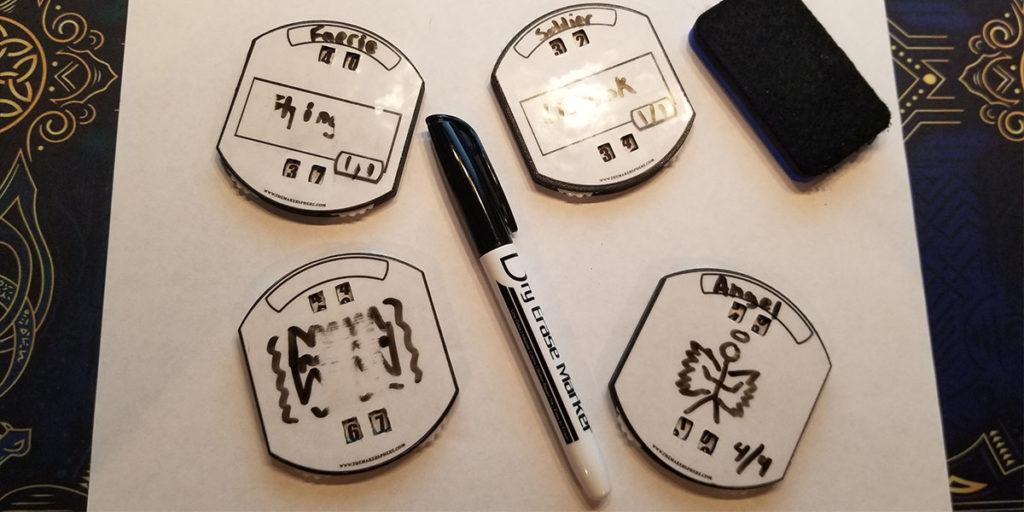
Want to create some MTG dry erase tokens with dual counters that go from 0-99? This is a fun and easy DIY project to create your own MTG dry erase tokens with just a few supplies and a 3D printer! If you don’t have a 3D printer, that is okay. Check to see if your town has a maker space. Maker spaces usually have 3D printers and other tools available to members. Also, check your local library if they have access to a 3D printer. Another place to check would be a local community college or university, if you have one close by.
These custom made Mass MTG Dry Erase Tokens are a hybrid of regular dry erase tokens that are card-sized and Relic Tokens. The biggest difference is that these tokens have two sets of 0-99 counters on them, rather than one set. The bottom set of counter wheels are to keep track of total number of tokens. The top set of counter wheels are to track how many tokens are tapped/attacking/summon sick/etc.
Table of Contents
This post contains affiliate links, which means I may receive a small commission, at zero cost to you, if you make a purchase through a link.
What are Mass MTG Dry Erase Tokens?
These Mass MTG Dry Erase Tokens are a spin-off of another project I created, Mass MTG Tokens. Mechanically, they are the same. Each tokens needs a shell, number wheels and some sort of face label. The label is where the biggest difference between MTG Dry Erase Tokens and Mass MTG Tokens is found.
On regular Mass MTG Tokens, the label serves as artwork for one specific token. Whereas with Mass MTG Dry Erase Tokens, the label is a whiteboard so it can be any token you want it to be by drawing on it. After the game is over, just wipe it clean and start fresh again with any other token type you’d like.
These Mass MTG Dry Erase Tokens are intended to be used as trackers for if you have tons of the same type of token. That is why there are two sets of 0-99 counters on them. One set to track the overall type number of tokens you have, and the other set to track how many are being interacted with at a given moment.
No longer will you need to have two copies of a taken to signal how many are summoning sick and how many are tapped and attacking. This nifty dry erase tokens handles both for you!
Building Your Own Mass MTG Dry Erase Tokens
Building one or even many Mass MTG Dry Erase Tokens is not too difficult. As long as you have access to a 3D printer, you will be good to go. As mentioned previously, check your local library or college to see if they have access to, or offer 3D printing for the public if you do not own a 3D printer yourself.
Mass MTG Dry Erase Tokens Supplies
- 3D printed shell (download both the top shell and bottom shell)
- Four 3D printed wheels (download the wheel and print 4x)
- Clear Dry Erase Sticker Sheets
- Printed Labels (download this Mass MTG Dry Erase Tokens Label Sheet and print it out on white paper)
- If you want to resize your labels, you can download each one individually where you got the shell and wheels
- Number wheel cutout (download this Number Wheel Sheet and print it out on white paper)
- Only needed if you print blank wheels without numbers
Mass MTG Dry Erase Tokens Tools
- Precision cutting knife – such as an X-Acto Knife
- Super glue
- A single nail that fits through your 3D printed wheels
- Scissors
- Scotch/Painters/Masking Tape
- Cutting mat (optional)
- Clamps (optional)
Psst... before continuing on, I just wanted to let you know this a remixed version of the Mass MTG Tokens project. If you'd rather have a token like this with artwork, check out the Mass MTG Tokens project.Start Building!
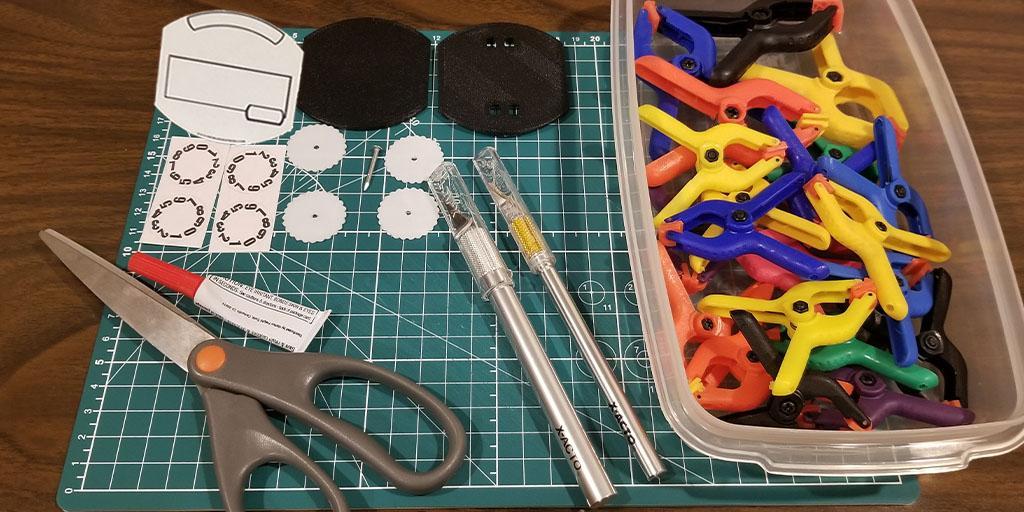
The step-by-step instructions for building Mass MTG Dry Erase Tokens is nearly identical to the step-by-step instructions for building Mass MTG Tokens. The only difference in the build process is going to be acquiring and making your front-facing labels and securing it onto the shell. Creating the dry erase/whiteboard label is going to be the first step.
Step 0: Print the Dry Erase/Whiteboard Parts
First and foremost, print all your 3D printed parts. It is best to use a flat surface build plate. It will make gluing the labels much easier! he 2.2mm wheels will snap into place on the top shell if your printer is perfectly tuned. I have provided other wheel sizes available in case the 2.2mm wheels do not fit on the downloads page. I would recommend printing the top-shell and a single wheel to test the fit. If it does not fit well, you can try the other sizes. Or you can widen the holes with a knife or drill bit. Once you know what wheel size you will be using, go ahead and print the rest of the wheels.
Step 1: Create the Dry Erase/Whiteboard Label
To begin, you will need to print your label(s) on a regular sheet of printer paper. It may be tempting to use card stock, or thicker paper, but that may cause the finished label to be thicker than what we are aiming for. I use Google Docs and place 9 labels on one sheet to print out. For my printer and my 3D parts, each label is sized 2.4 inches wide and 2.7 inches high. If you end up downloading and printing the PDF sheet, that is the size of all of those labels on it. If the labels are too big or too small, you can download the individual labels and size them to your needs.
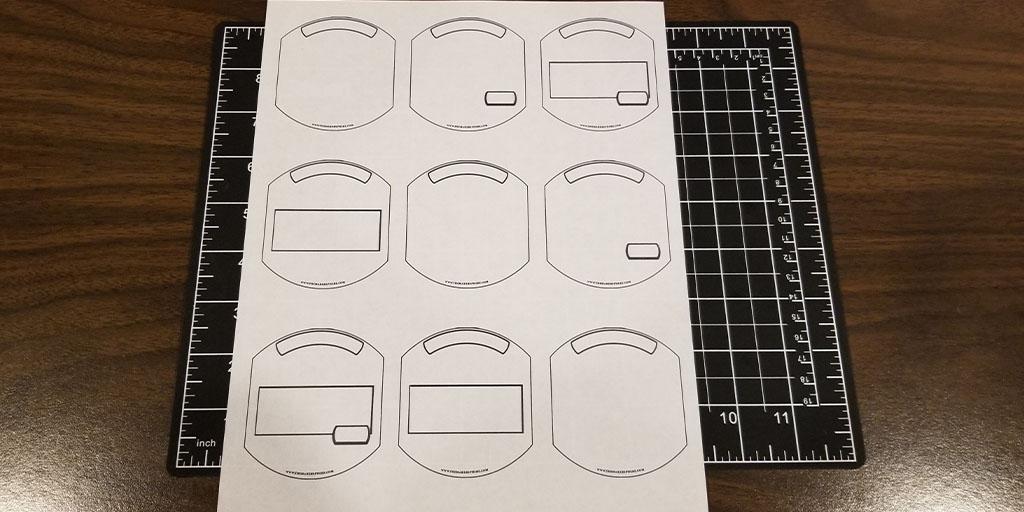
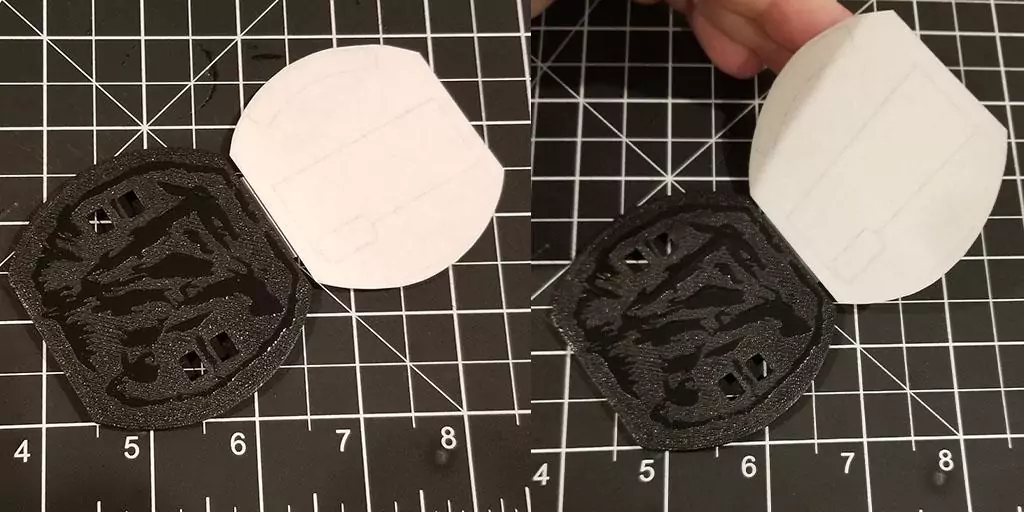
Once you have your labels printed out, be sure to not fully cut them out yet. We need to apply the dry erase layers first to so we can cut everything out together. Begin by cutting out each label as shown below.
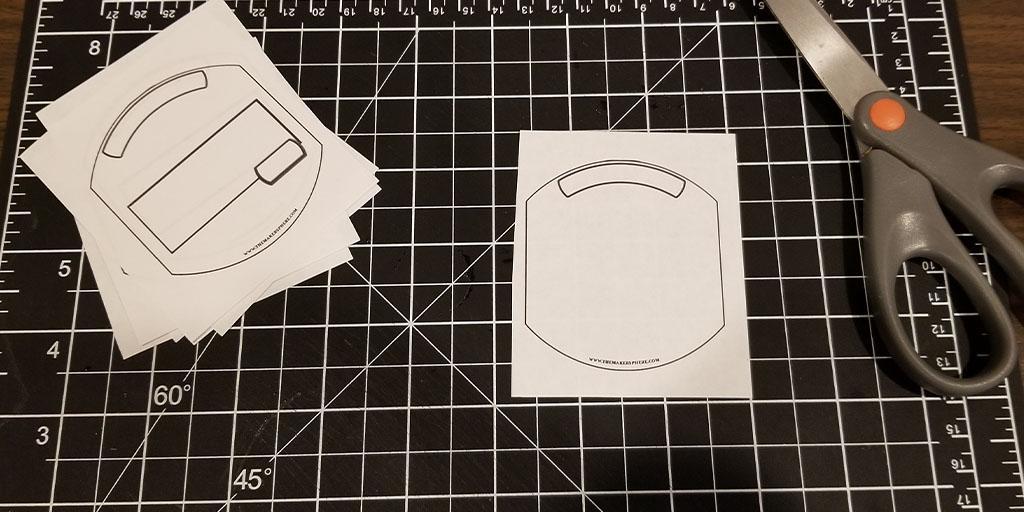
Next, cut up a sheet of the Clear Dry Erase Sticker into nine sections, just like you did for the printed out labels. You will need two of these sections for every one label. We will be applying them on the front and back of the white paper label.
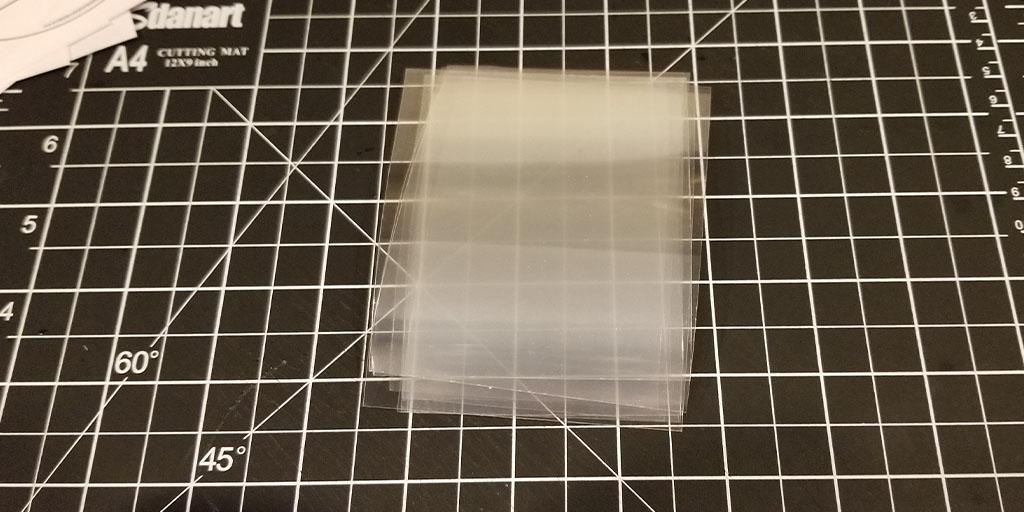
Take your label and one of the clear dry erase sticker sections and begin to peel off the backing. There is a backing that is protecting the sticker side, and, **IMPORTANT** there is also a protective layer on the front side too. If you don’t remove this front side protective layer, your dry erase markers will not work!! With that being said, for now we just want to remove the sticker side’s protective layer. Use a piece of tape on the corner to easily remove the protective layer. Lay the clear sticker on your work surface, sticker side up, and then place the white label on top of it. Be weary of bubbles as you apply the white label.
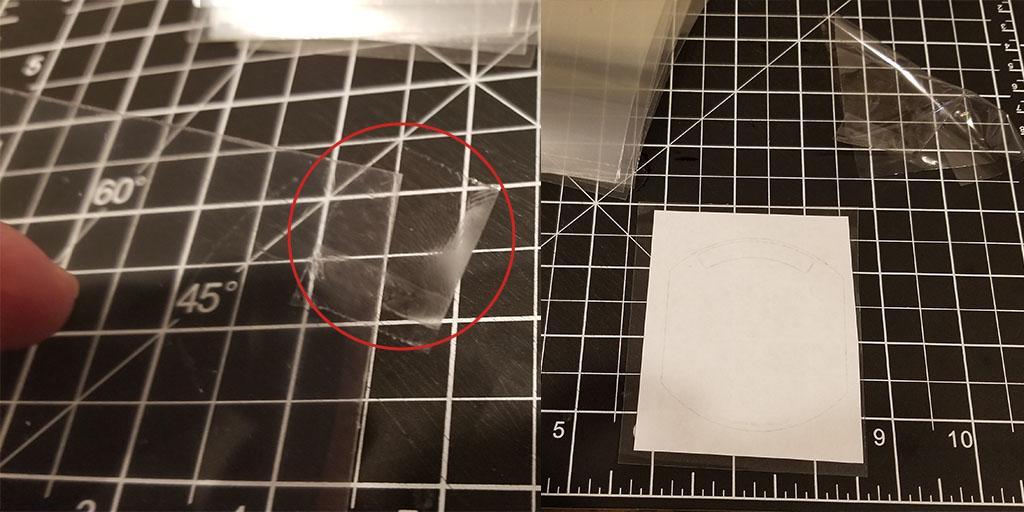
Repeat this exact process, but this time, apply the clear sticker to the other side of the white paper. Both sides should now be covered in the clear dry erase sticker sheet. Go ahead and remove the final two protective film layers from both sides of the bonded label now. You should have removed a total of four protective layers. Two layers on each of the sticker sides, and Two layers on each of the front facing sides. Your label should now look similar to mine.
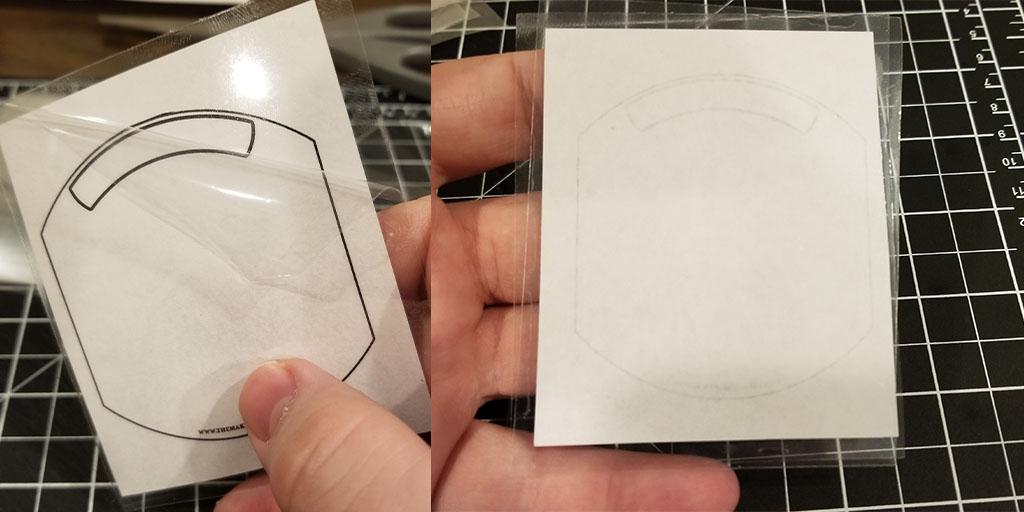
All that remains is to cut everything out along the edges. To make things easier, first cut the straight sides, then cut the curved sides. Once you are done cutting them out, your label will be good to go!
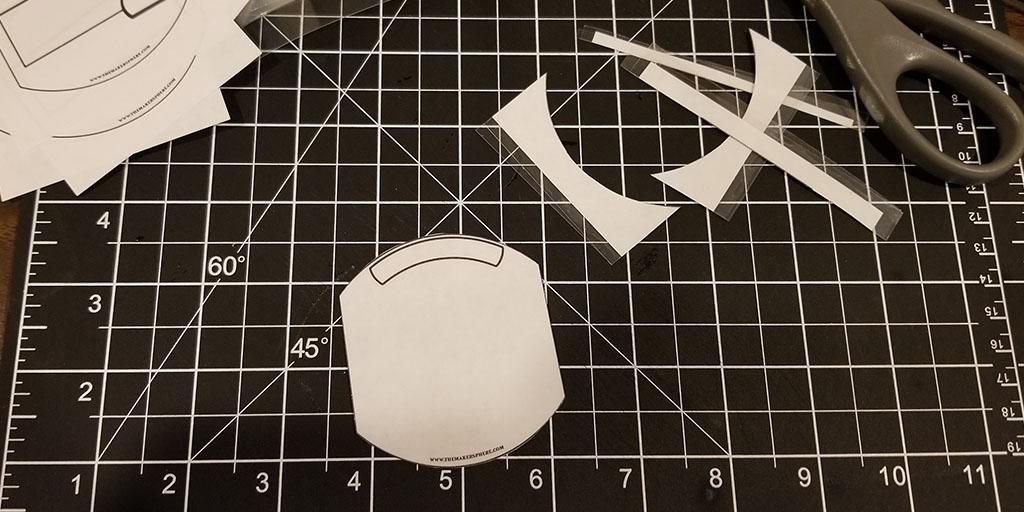
Step 2: Creating the Number Wheels
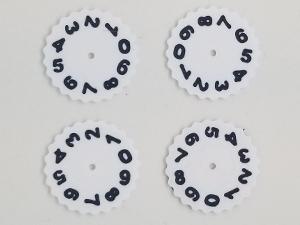
There are two options for the number wheels. Depending on your printer’s capabilities, the first option is to print the wheels with numbers on the print itself in dual colors. If you are taking this approach, you can skip down to Step 3.
The second option is to just print blank wheels and glue the numbers on each wheel via the number-wheel-template download from above. The following instructions will show you how to do this. If you’re able to, the first option is much cleaner and nicer looking!
Take your printed number wheel sheet and cut out the first 4 wheels on the top left, moving to the right. Take one of the cut out number wheels and position it on top of one of the 3D printed wheels. Center the cutout on the wheel and poke the nail through, piercing the cutout. Now, remove the nail but leave the cutout on the nail as shown below. Add some super glue to the 3D printed wheel and slide the nail back through the hole. This will glue the number wheel cutout to the wheel itself and with any luck, the number wheel will be centered.
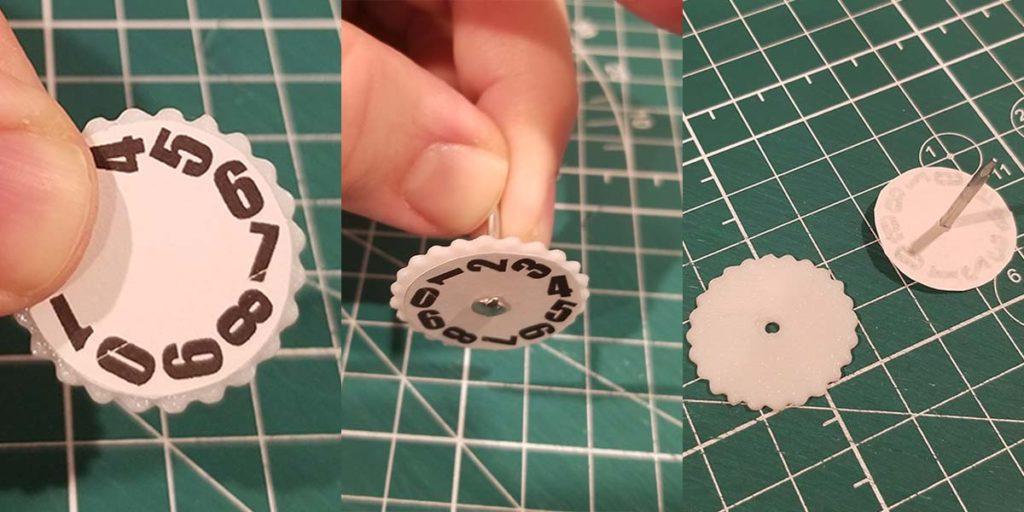
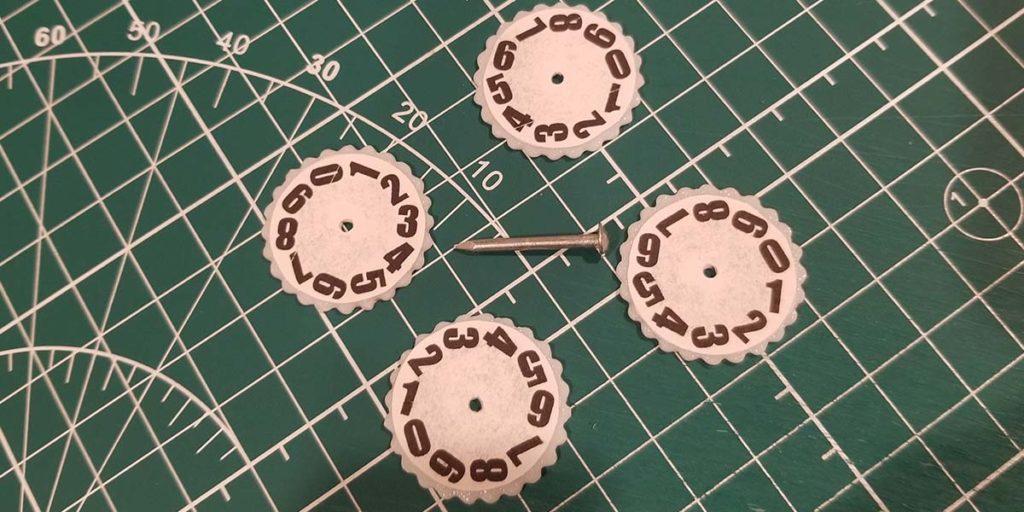
Repeat this process for the 3 other 3D printed wheels and cutouts. Be aware, each wheel should have a different cutout on it. No cutouts are the same and each wheel has a specific place it goes, so they are not interchangeable, even though they all look alike.
Step 3: Applying the Mass MTG Dry Erase Tokens’ Label onto the Shell
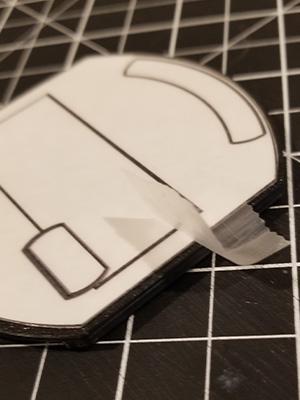
Once you have your label created and the two shell 3D printed parts ready, line your label up on the top shell (the piece with the 4 windows on it). Once you have it lined up, take a piece of tape and apply it to the right side of the label so the tape sticks to the top of the label, the side of the shell, and wraps around to stick on the bottom of the shell. It should like similar to mine.
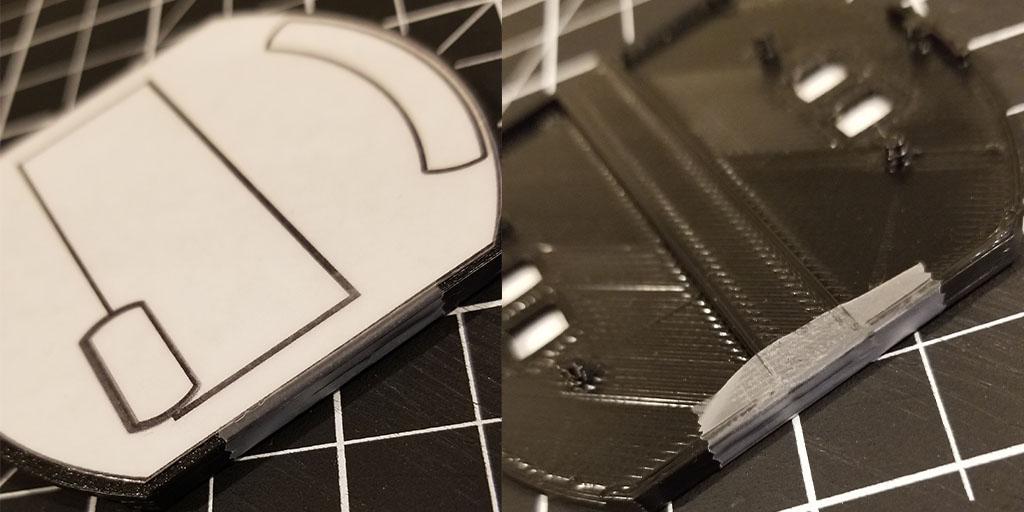
Now, open it up like a book and apply super glue to the top of the top shell. Once you have enough glue, go ahead and close the label on top of the shell and make sure it is straight. The tape should assist and guide the label to fall flat and true. Once you are satisfied, apply some pressure for a minute or two and then set it to the side to dry.
After a few hours or when the label is dry and permanently attached to the top shell, go ahead and remove the piece of tape.
Step 4: Opening Up The Windows
Next up is cutting out the number wheel windows. Lay your top shell face down and using a precision cutting knife, cut through each window on all four sides. You top shell’s front side should look similar to mine. Notice the cut marks for each window.
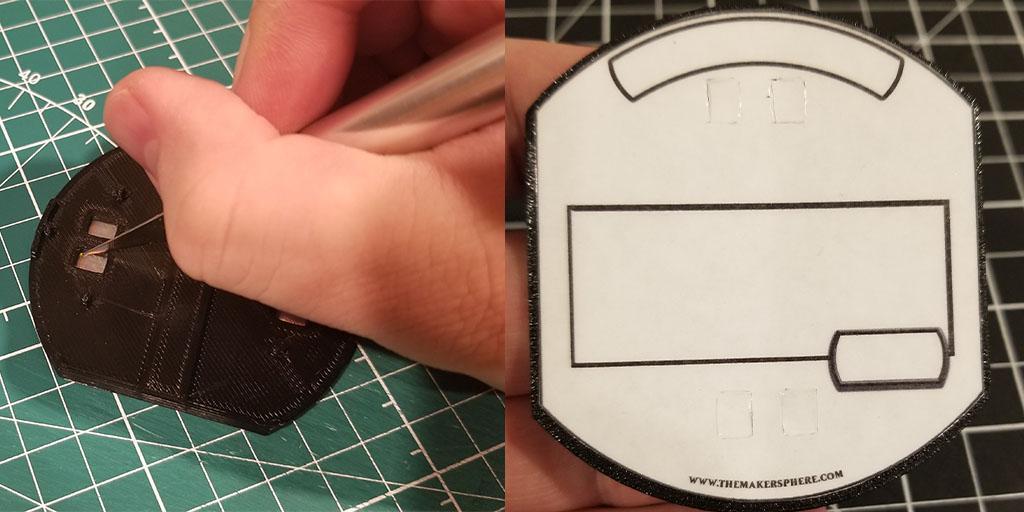
Carefully cut away any left over bits and remove the pieces to open the windows up. Once finished, your label will be fully complete, glued and with the windows open.
Step 5: Adding the Wheels
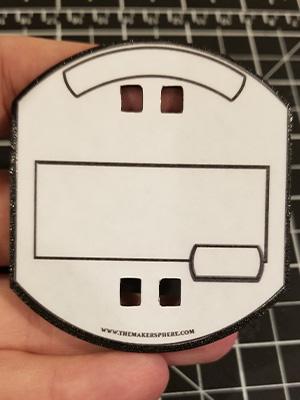
Almost finished! Now we are going to place the wheels in the correct positions. Grab any wheel and start aligning it to each window until you find the window it fits in. The numbers on the wheel should be straight within the window. Again, each wheel only goes in one window position. Once you have found that wheel’s position, fit it on to the pole of the top shell.
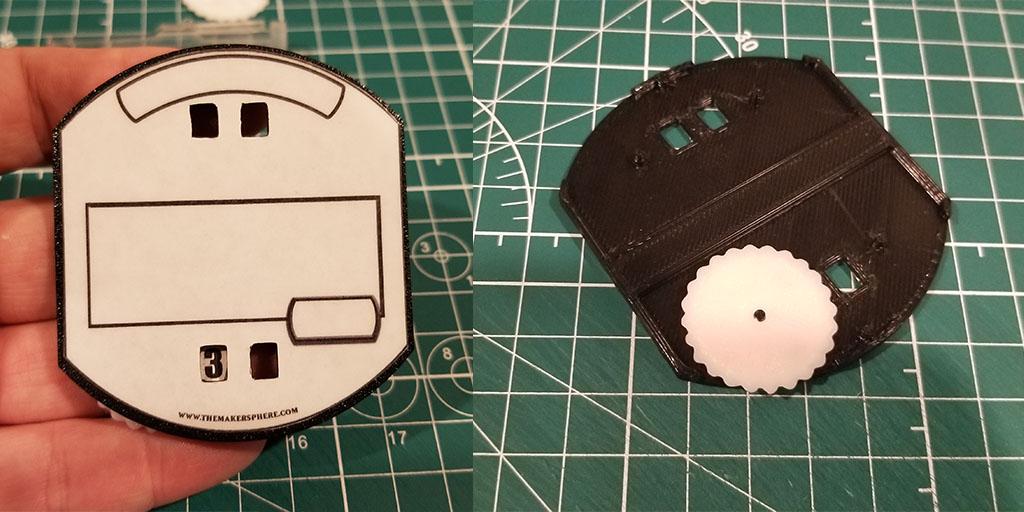
You may need to bore out the number wheel’s hole a little bit if it does not snap into place. Repeat this process for the 3 remaining number wheels. Once all 4 wheels are in their position, your top shell should look like mine.
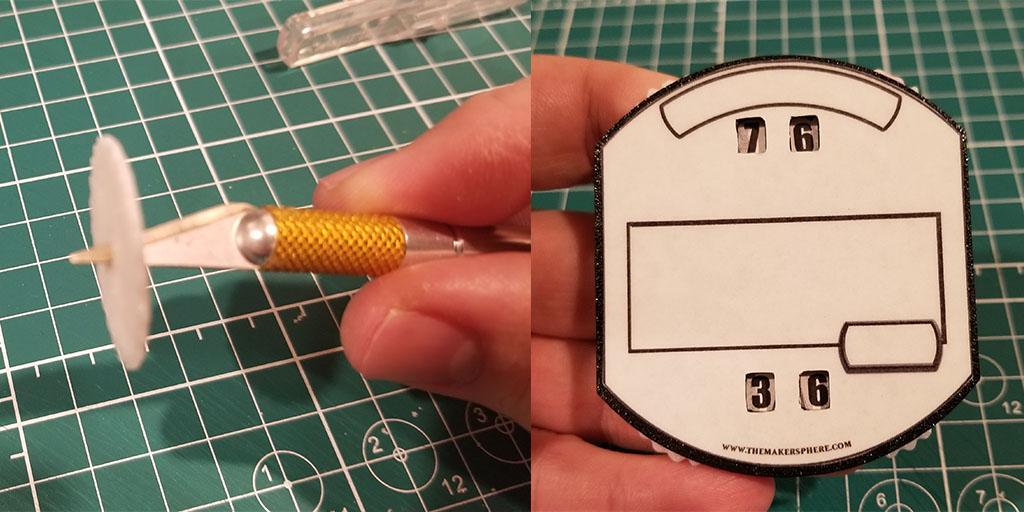
Step 6: Gluing Up the Mass MTG Dry Erase Token
This is the final step, you’re almost there! Now that the wheels are secured in their positions, all that is left to do is the glue the top shell and bottom shell together. Apply super glue to the edges and middle bar of the top shell. Add a small amount of super glue to the bottom shell on the top and bottom holes. Place glue on your shell pieces where the red lines are.
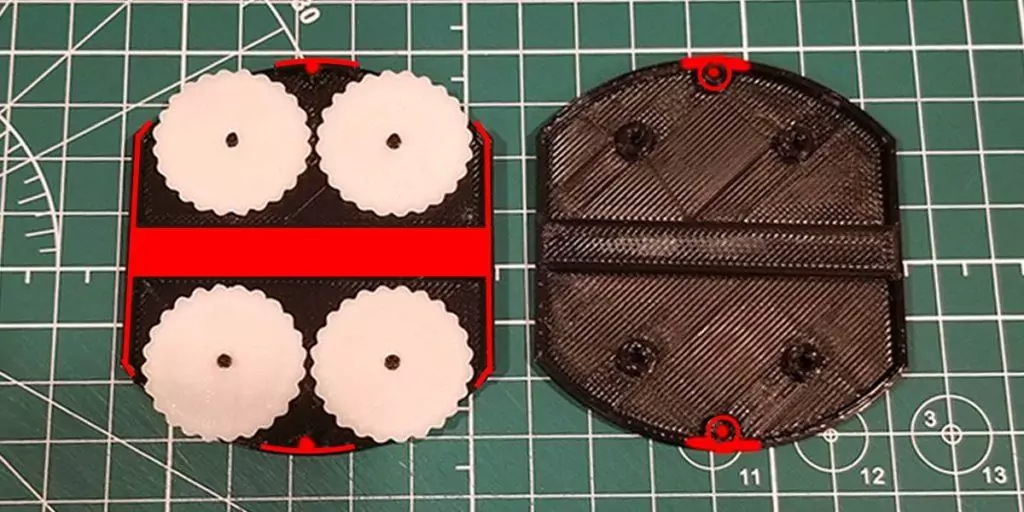
The last thing is to clamp it down or lay something heavy on the Mass MTG Dry Erase Token. Let it dry while clamped for a few hours. You’re done! Congrats!
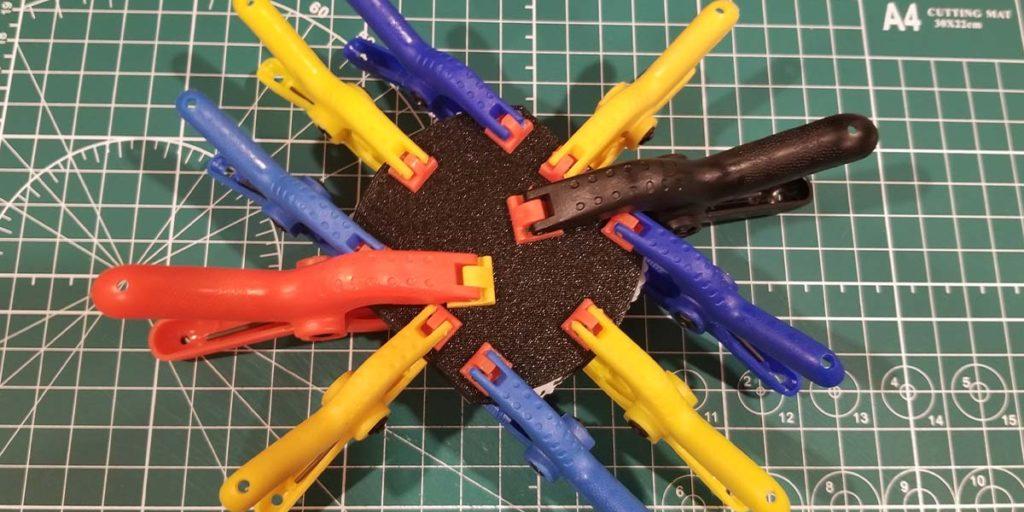
Final Thoughts
I hope you enjoyed this Mass MTG Dry Erase Tokens DIY project. If you have any thoughts or even different label suggestions, leave them in the comments below or find me on Twitter. I’d love to see how yours turned out. Share some photos of your build and let the world see them! Tell a friend or two as well!
You May Also Enjoy


Leave a Reply