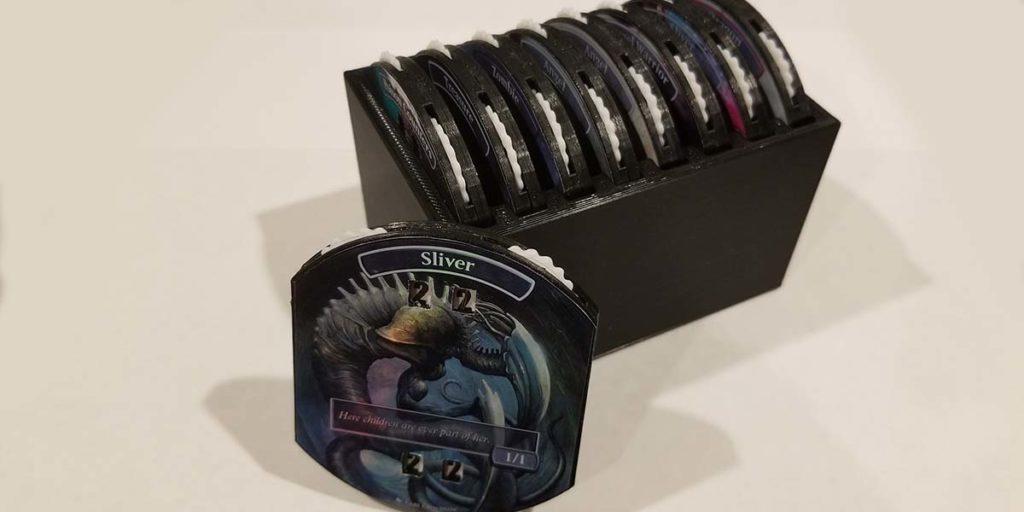
If you have ever wanted to build or create your own custom DIY MTG tokens, Mass MTG Tokens may be the ideal DIY project for you. This project tackles an issue I think a lot of MTG players face: how do you keep track of all of your tokens of one kind? The solution most people have come up with is to use two of the same token. One token to represent the total number of tokens and then another for keeping track of the number of tapped and/or attacking tokens.
This is a wonderful MTG DIY project to create your own customized tokens I’ve “cleverly” named Mass MTG Tokens. Each token has dual counters for tracking the total number of tokens, as well as the number of tapped, attacking, or summoning sick tokens. The token labels can be created to fit your exact vibe and display any artwork that inspires you. Check out this full guide to build your own Mass MTG Tokens, complete with free model downloads to 3D print yourself.
Table of Contents
Research and Design for Better MTG Tokens
Remembering my childhood, I started thinking about how umpires in little league baseball kept track of balls/strikes/outs/innings using an Umpire Indicator. For anyone unaware, it a small device with four number wheels on it. Each number wheel corresponds to balls, strikes, out and innings.
After a bit of research, I found something called a Relic Token. However, these Relic Tokens seem more dedicated to life total and commander damage rather than representing tokens. Really, I just wanted something that keeps track of the total number of tokens I have, but also has the ability to keep record of how many of those tokens have summoning sickness, are tapped, or are attacking.
Out of curiosity, I searched to see if anyone had made anything like this, but for MTG tokens on the 3D printing sites. With some luck, I found a neat design and then started tinkering around with it. Some time later, I ended up heavily modifying the design and ended up creating a remix of it to fit my needs perfectly. I have dubbed my custom solution: Mass MTG tokens.
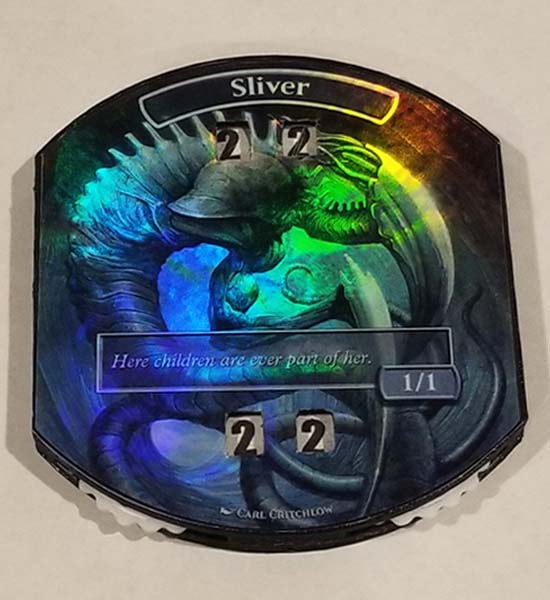
These Mass Tokens have an upper and lower set of numbers that range from 0-99. This will allow folks to use the bottom set of numbers to keep track of the total number of tokens. Then use the top set of numbers to track sickness/tapped/attacking status. Another neat ‘feature’ is the ability to use customized pictures for your Mass Token. Since this is homemade, you are not restricted to only official artwork!
This post contains affiliate links, which means I may receive a small commission, at zero cost to you, if you make a purchase through a link.
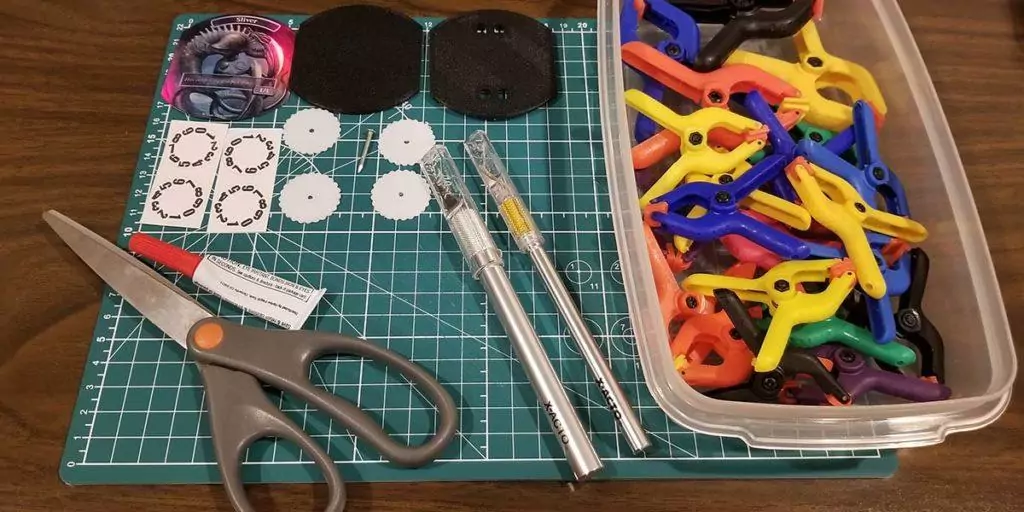
Mass MTG Tokens Supplies List
- 3D printed shell
- Four 3D printed wheels (download both the 2 shells and wheel STLs)
- Optionally the 3D printed Box that holds 8 Mass MTG Tokens (found with the shell and wheel STLs above)
- Printed label
- This awesome holographic sticker paper works really well and is what I use to print my labels on
- Make your labels using this Mass MTG Token Label PhotoShop Template
- Alternatively, here is a Blank Mass MTG Token Label Template if you want something custom
- Top-left, top-right, bottom-left and bottom-right number wheel cutouts
- Only needed if you print blank wheels without numbers
- Download this Mass MTG Tokens Number Wheel PDF to print out your number wheel cutouts on regular white printer paper
Mass MTG Tokens Tools List
- Precision cutting knife – such as an X-Acto Knife
- Super glue
- A single nail that fits through your 3D printed wheels
- Scissors
- Cutting mat (optional)
- Clamps (optional)
Psst... before continuing on, I just wanted to let you know there is a remixed version of this project that has a dry erase surface. If you're interested, check out the Mass MTG Dry Erase Tokens project.Supplies and Tools All Set
Step 0: Printing the Mass MTG Tokens
Begin by printing all your 3D printed parts. Use a flat surface build plate if you have one. If your printer is perfectly tuned, the 2.2mm wheels will snap into place on the top shell with a bit of force, but able to spin afterwards. The downloads page will have other wheel sizes available in case the 2.2mm wheels do not fit.
I would recommend printing the shell (top and bottom can be printed together) and a single wheel to test the fit. If it does not fit well, you can try the other sizes. Or you can bore out the holes, which will be mentioned later. Once you are satisfied, print the rest of the wheels.
Now that the 3D printed parts are done, you will need a label. If you are using the holographic sticker paper mentioned in the Supplies List and are unsure how to print on it, check out this sticker printing page. That page will also go in to detail on how I print my labels the correct size to fit the 3D printed Mass MTG Tokens shell.
The tldr; version is, I put my labels on Google Docs and size them 2.35 inches wide and 2.65 inches tall. These sizes work best for me. After your materials are prepped and ready, cut out the label and the 4 number wheels (if you’re using them).
Step 1: Number Wheels
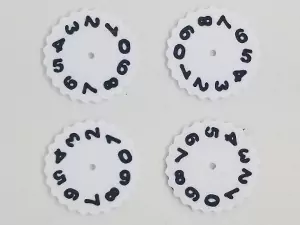
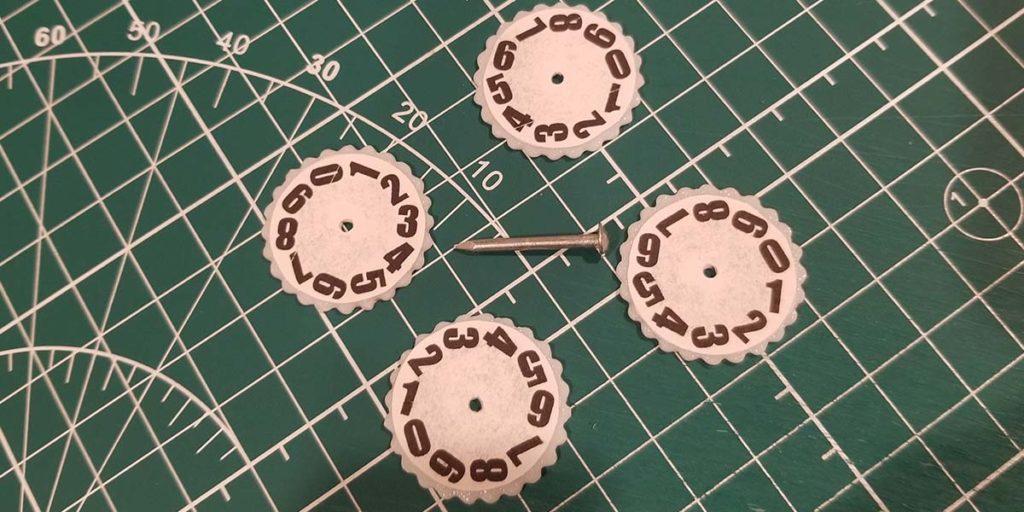
There are two options for the number wheels. The first option is to print the wheels that have the numbers on them already in two separate colors. This is the easiest and best looking option, but also requires that you have a printer capable of printing this technique. If you are printing these wheels, you can skip down to Step 2.
The second option is to just print the plain wheels and glue the numbers on each wheel. The first option is much cleaner and nicer looking, so if you’re able too, go that route!
First, position a number wheel cutout on top of the wheel itself. Once it is centered, poke the nail through the wheel, piercing the number wheel cutout along the way. Next, remove the wheel and leave the cutout on the nail. Place the nail and cutout to the side. Then, add a small amount of super glue to the wheel and push the nail back through. This will glue the number wheel cutout to the wheel itself.
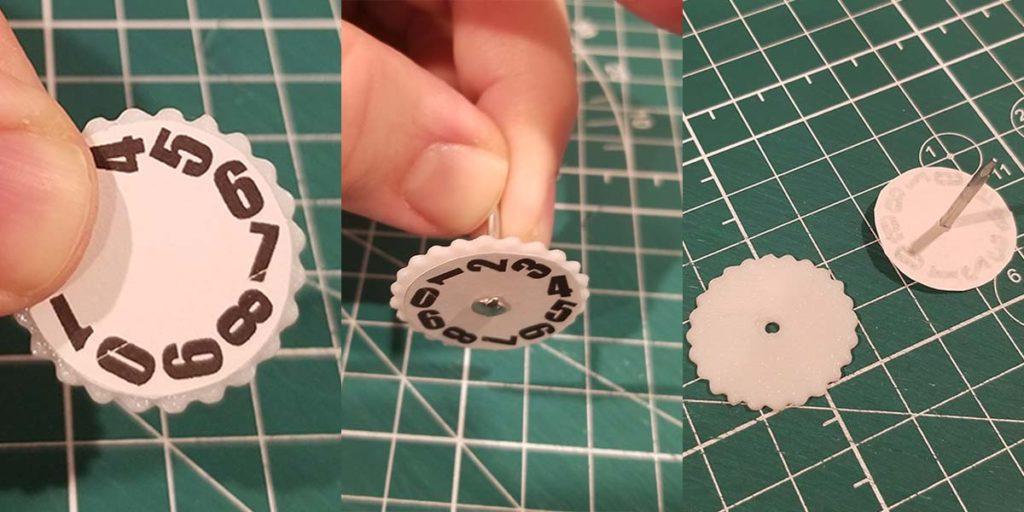
Remove the nail and repeat this process for the 3 remaining wheels.
Step 2: Mass MTG Tokens Shell & Label
Now attach your label to the top shell.
If your label is a sticker, you once again have two options. The first option is to just stick the stick on the shell. This only works if you use a flat build plate and your first layer is perfect. If this is the case, the surface the stick attaches to should be very smooth, which will allow the sticker to stick very well without the need for glue.
The second option is the glue the label on. For the Mass MTG Token shown in this guide, I will be going with the second option because I used a textured build plate which gave my shells a textured, non-flat surface.
Regardless of whether you use glue or not, if you’re label is a sticker, I recommend peeling the backing off half way (from the top of the label) and sticking it onto the shell. This should make aligning the label much easier.
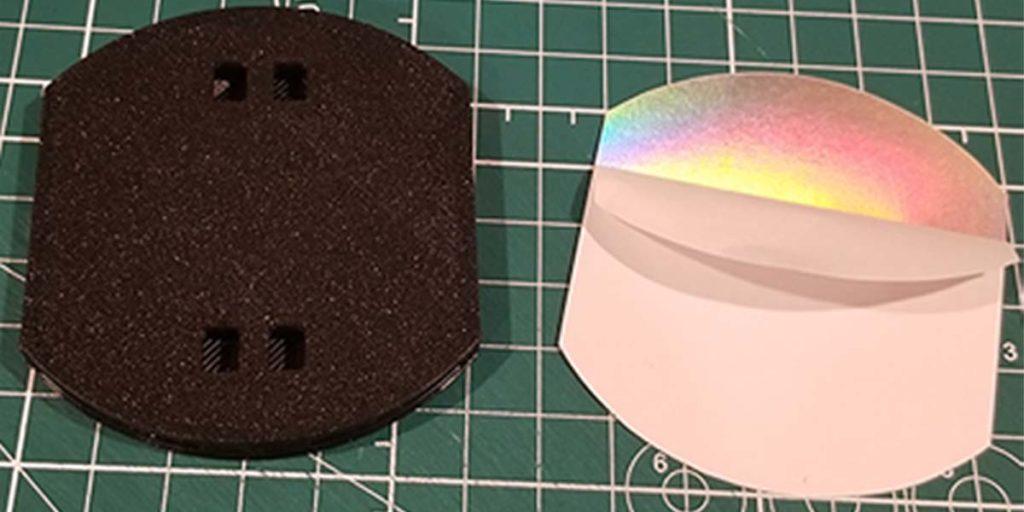
Once you have the label perfectly aligned follow these instructions, depending on which option you are using:
- For option one:
- Remove the second half of the backing and completely stick the label to the shell. You can move on to Step 3.
- For option two:
- Place super glue onto the bottom half of the top shell and stick the rest of the stick to it. At his point, the sticker should be completely on the shell, but only the bottom half of the stick will have super glue on it. The top half is below, continue on with this section.
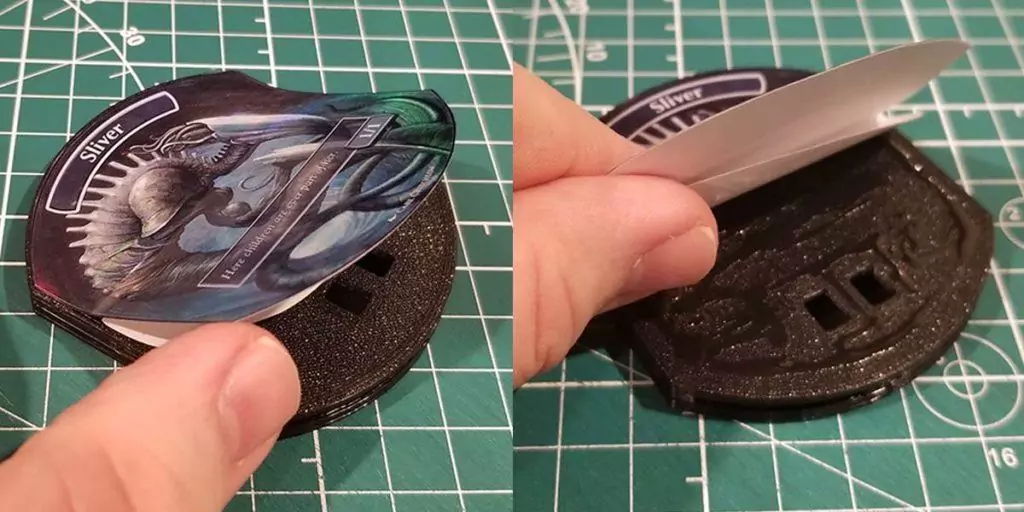
After letting the bottom half of the label dry for a bit, peel back the top portion of the sticker’s label and apply super glue there so the entire label is now super glued. Now stick it in place and let it dry.
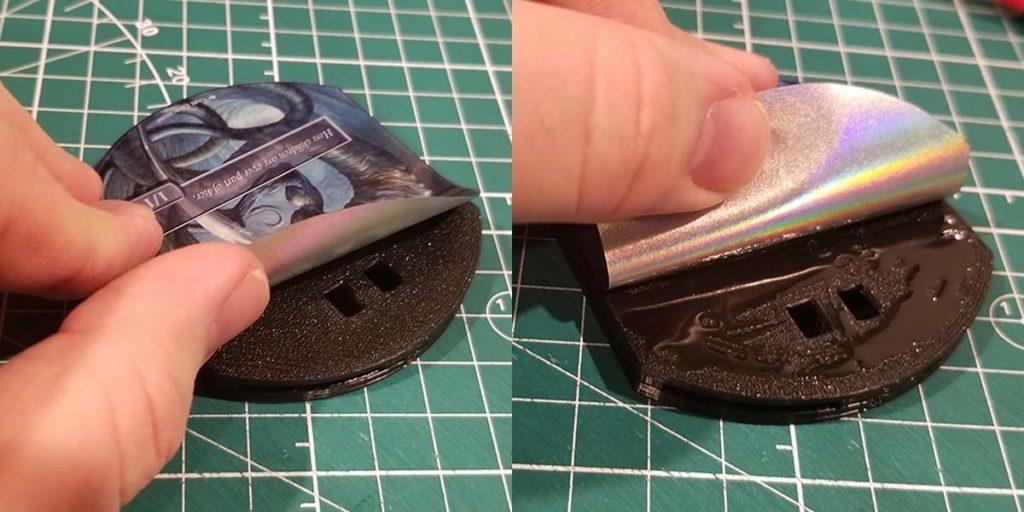
If your label is regular paper, place super glue onto the top shell and stick the paper to it. Be warned, there is a very fine line when it comes to the amount of super glue. Too much, and the label will potentially have dark spots where the super glue has bled through. Using too little super glue will result in a poor bond between the paper and the shell.
Step 3: Opening the Windows
After the label has completely dried (if using glue), it is time to make the windows for the number wheels. Lay your top shell face down and grab your precision cutting knife. Begin by cutting through a window on all four sides. Then do this for the remaining three windows. Be careful to not move the shell too much while cutting out the windows, as it may scratch the label.
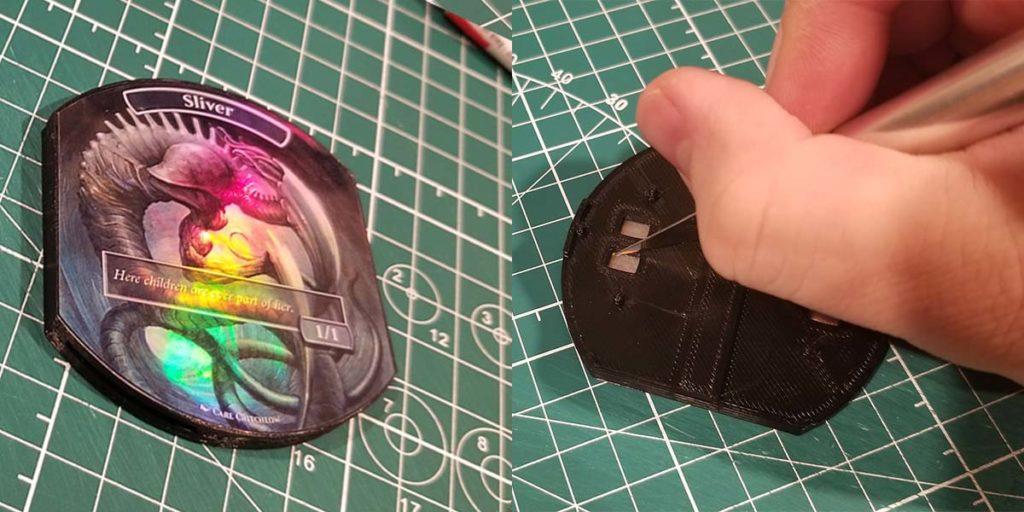
After cutting all four windows, you will probably need to carefully make some fine cuts for the pieces to fall out. Be careful to not pull if the inside of the windows are still attached. This could cause the label to rip.
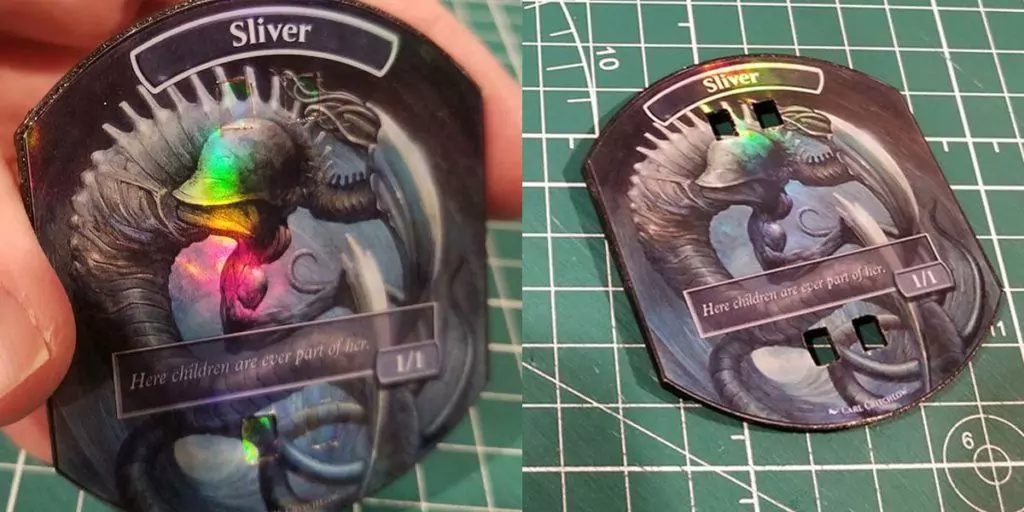
Step 4: Add Wheels to the Mass MTG Tokens Shell
Next, it is time to put the wheels into place on the Mass MTG Tokens top shell. Grab a wheel and line it up with one of the pins on the top shell’s underside. Rotate the wheel to see if the numbers are straight when they are within the window. Each wheel should only work in one window position. After finding the pin that wheel belongs to, push it in so that the number side of the wheel is flush with the shell.
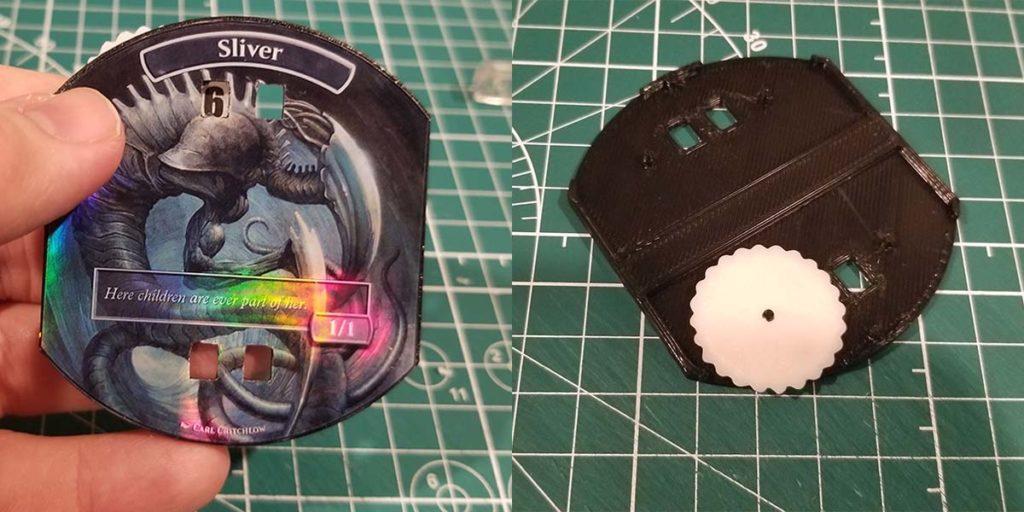
You may need to bore out the wheel if it doesn’t fit properly on the pin. For example, three of my wheels fit perfectly, but one of them, I had to bore out. Repeat this for the remaining three wheels. Afterwards, all number wheels should be straight within each window.
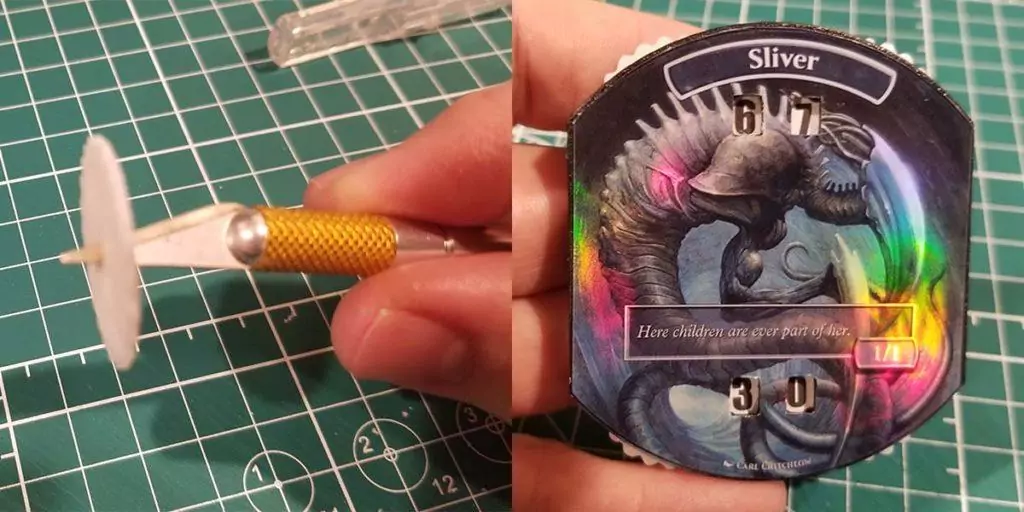
Step 5: The Glue Up
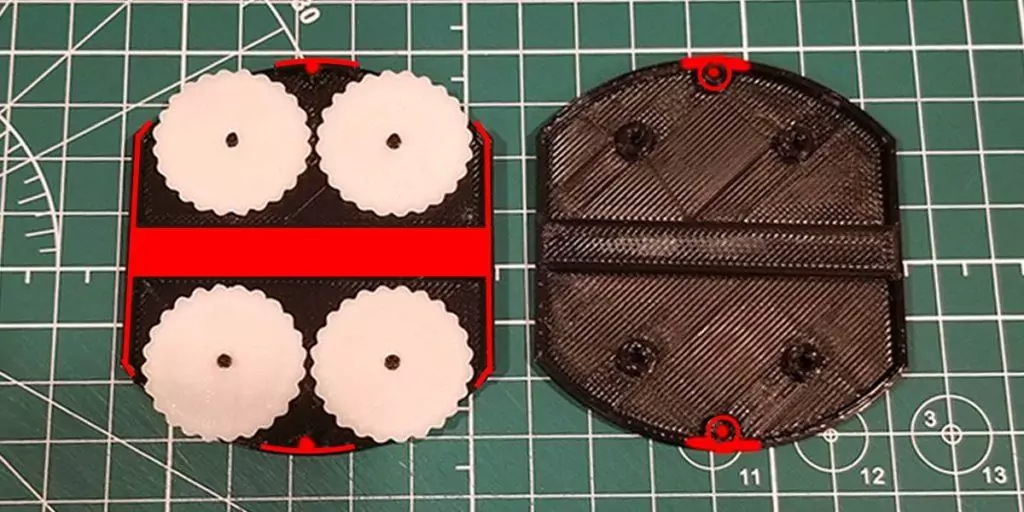
Finally, it is time to glue the Mass MTG Tokens bottom shell to the top shell. Carefully place super glue around all the edges of the top shell and along with middle bar. Then, place super glue on the top and bottom holes on the bottom shell. See the markings in red for a visual aid.
Final Step: Clamp it Down
Once the glue has been placed on each shell piece, take the bottom shell and flip it on to the top shell. Then use clamps or something heavy to hold it in place until the glue dries. Be sure to not clamp directly on to the label. It can and will deform it – I’ve made that mistake before. For example, I use another one of my Mass MTG Tokens underneath the one that needs to dry. I put the two label-to-label and then clamp them both.
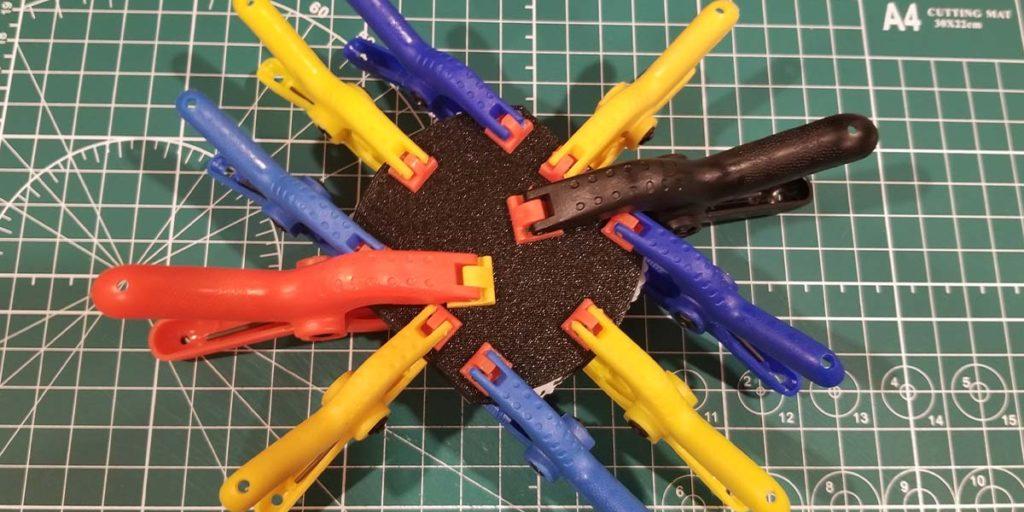
After waiting a few hours for the glue to dry, remove the clamps. Congratulations, you have made yourself some Mass MTG Tokens.
Wrap Up
I hope you enjoyed my Mass MTG Tokens project and have great results yourself. If you end up making some, I would love it if you shared how they came out. Post a link in the comments below to your creations and/or hit me up on Twitter @themakersphere. Seriously, I am very curious what other folks come up with for their labels. The possibilities are near endless. Thanks for sticking around to the end and have a wonderful day!
The Sliver artwork was done by Carl Critchlow as the Metallic Sliver Token from Time Spiral Remastered.
You May Also Enjoy



Leave a Reply