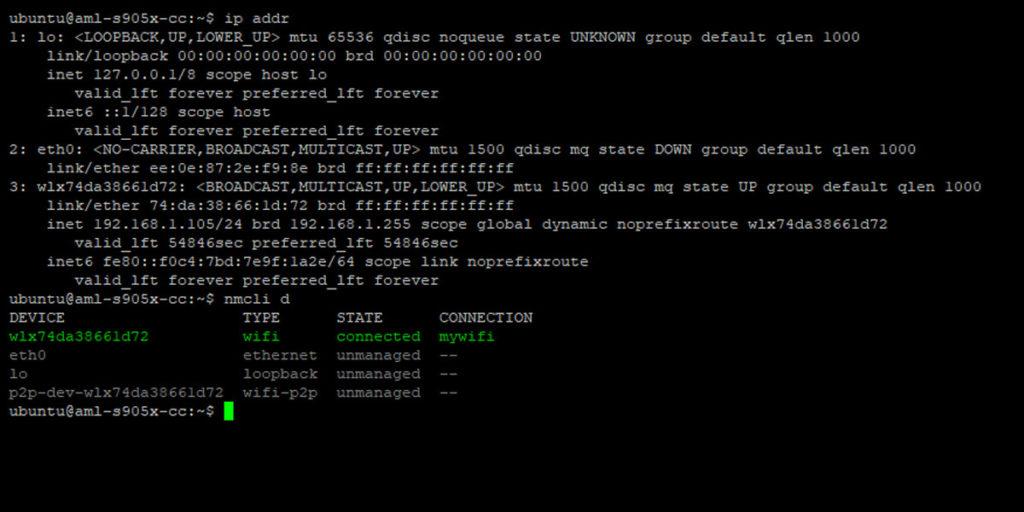
The process to set up WiFi on Ubuntu server or Linux in general can be a little daunting, if you’re not familiar with it. Unlike Windows or MacOS, where you can use your mouse and graphical interface, with Ubuntu Server, you will need to use the command line interface. But, don’t let this deter you as this process is very simple using a nifty tool called nmcli!
This is a very straightforward, and easy to follow guide that will have you set up WiFi on Ubuntu Server in as little as 3 minutes. This guide has you covered from start to finish, and even set up WiFi on Ubuntu Server using a hidden WiFi network too! By utilizing nmcli, a great Linux utility, we will be able to set up, configure and save a WiFi connection using the command line. Let’s jump right in to it!
Table of Contents
Set Up WiFi on Ubuntu Server or Linux: First Step
Either use a keyboard on the device itself and use the terminal there. Or establish an SSH connection to your device running Ubuntu Server by plugging in an Ethernet cable from your router to the device and logging into the device.
Now, install Network Manager using apt. Type the following command into your terminal and type ‘y’ when asked to initiate the installation:
sudo apt install network-managerIf you receive a message saying network-manager cannot be found such as:
E: Unable to locate package network-managerYou may need to run the following command and then re-run the previous command:
sudo apt updateOnce network-manager is installed, we will list out all the adapters currently available to use. Type the following command into your terminal:
nmcli dAfter running that command, you should get an output that looks something similar to:
$ nmcli d
DEVICE                   TYPE      STATE         CONNECTION
...
wlx74da38661d72          wifi      disconnected     --
eth0                     ethernet  unmanaged        --
lo                       loopback  unmanaged        --
p2p-dev-wlx74da38661d72  wifi-p2p  unmanaged        --
Look for the DEVICE with a TYPE of ‘wifi’ (not ‘wifi-p2p). On the off chance you don’t have any devices with a type of wifi, your USB WiFi Dongle is probably not supported for linux and you should get/try a different dongle. If a device does appear, you are good to go. Make sure the WiFi radio is turned on by running:
nmcli r wifi onIf you are broadcasting your network (or are unsure what this means), use the Regular WiFi Network steps. If you are not broadcasting your network, skip to the Hidden WiFi Network steps.
Regular WiFi Network
Next step is to list out the available WiFi networks. Run this:
nmcli d wifi list$ nmcli d wifi list
* SSID MODE CHAN RATE SIGNAL BARS SECURITY
...
my_wifi_name_here Infra 5 54 Mbit/s 89 ▂▄▆█ WPA2Now connect to your WiFi network. Use the following command. In this example output above, the <ssid> would be my_wifi_name_here.
nmcli d wifi connect <ssid> password <password>Hidden WiFi Network
For connecting to a hidden network, you will want to make note of the Device Name. Giving the above output of all of the adapters available, the device name would be wlx74da38661d72. With that device name ready, run:
nmcli c add type wifi con-name <a unique name> ifname <device name> ssid <ssid>

Using the example information, my command would look like:
nmcli c add type wifi con-name mywifi ifname wlx74da38661d72 ssid my_wifi_name_here
Next, we want to set up the password.
nmcli c modify <name> wifi-sec.key-mgmt wpa-psk wifi-sec.psk <password>

Using the example information, my command would look like:
nmcli c modify mywifi wifi-sec.key-mgmt wpa-psk wifi-sec.psk abcde12345
All that is left is to start up your connection with:
nmcli c up <name>

Using the example information, my command would look like:
nmcli c up mywifi
WiFi Network Wrap Up
Now that you have set up WiFi on Linux, you can additionally set a static IP address too. I have written a super simple and fast guide found at Set Static IP Address on Linux.
For more information on both hidden and regular WiFi network setup in Ubuntu Server using the CLI, read the official documentation page for Configure WiFi Connections.
Obtain your new IP address:
hostname -I$ hostname -I
192.168.1.128I had a really tough time setting up a hidden network using the command line. After finally figuring out how to do it, I wanted to share and give examples to make things clear. I hope this helped solve your CLI WiFi issues!
You May Also Enjoy


Leave a Reply