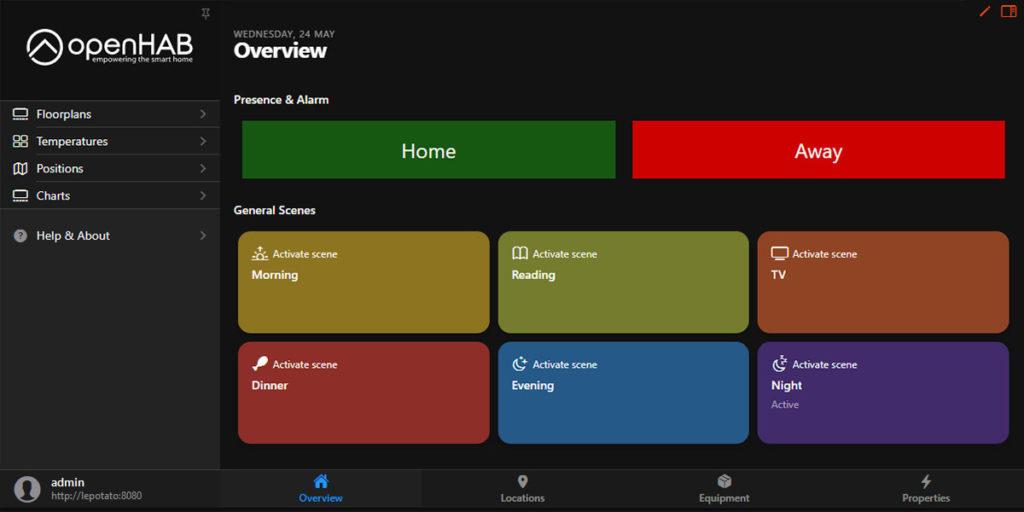
Are you wondering how to install openHAB on a Le Potato? Home automation has really taken off in popularity the past few years. And there are no signs of it slowing down in the future. In fact, home automation will become even more a part of our daily lives as technology keeps advancing and evolving.
This guide will walk you through each step to install openHAB on a Le Potato board with ease. Everything will be covered including necessary hardware, required downloads and every single command line input needed! No mess, no fuss, just a step-by-step guide to get openHAB installed on a Le Potato board as quickly as possible. The entire process should take less than 30 minutes. Let’s get started.
Table of Contents
This post contains affiliate links, which means I may receive a small commission, at zero cost to you, if you make a purchase through a link.
What is openHAB?
openHAB is a home automation platform designed to run on a variety of devices to make compatibility a non-issue. It has, what openHAB dubs, “pluggable architecture” which supports more than 200 different technologies and systems and thousands of smart devices. Within the software itself, you have the ability to design rules with time and event-based triggers.
The openHAB software also allows for your to create scripts and actions along with a notification system and utilize voice control! It is also relatively easy to setup and get started, requiring very little to no knowledge about the OS you are installing to.
Why Use a Le Potato for an openHAB Install?
The Le Potato single-board computer is a fantastic DIYers board. It was designed to be a drop-in-replacement for the Raspberry Pi 3 Model B boards, but it has a more powerful CPU and GPU than that Raspberry Pi model has, which is fantastic. Additionally, it is very economical in terms of price and is also readily available to purchase.
With the Le Potato board, there is no reason to resort to scalpers and their high prices because the Le Potato is almost always in stock! Hardware wise, the Le Potato makes for a great openHAB install. It has all the recommended specs needed to easily run openHAB.
Install openHAB on a Le Potato
This Install openHAB on Le Potato guide may seem long and intimidating, but I assure you, the process is relatively short and easy to complete. Just make sure to read everything and follow the directions and you’ll have openHAB installed and running in no time!
Project Parts
- Required Parts:
- Le Potato board – make sure to get the 2GB memory model
- Le Potato Power Supply
- Micro SD Card
- Optional Parts:
- Le Potato Heatsink (optional but recommended)
- Linux-based USB WiFi Dongle (optional but required if you want to use WiFi)
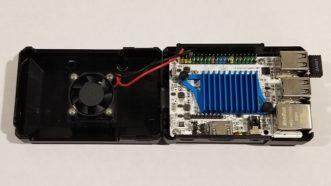
- Standalone Le Potato Case (optional but recommended)
Downloads
- Armbian Jammy (CLI, not desktop) – about a third of the way down the page is the download link with the latest stable Armbian version for Le Potato boards
- An SSH client – Putty is what I use
- An image writing program – I am on Windows and I use Win32 Disk Imager
- A program to extract the Armbian image – I use 7-Zip
Step 1: Install openHAB – Prepare
Writing Armbian to an SD Card
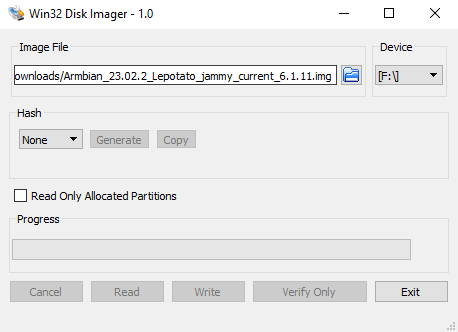
After collecting all the hardware and downloading the required software you are ready to begin. To start, we will need to flash the Armbian image to the micro SD card. Extract the .img Armbian file from the .xz file using whatever software works best for you. I recommend using 7-Zip for this, as stated in the downloads section. Now that you have the Armbian .img file, flash it to your micro SD card.
As mentioned in the downloads section, if you are on Windows, I suggest using Win32 Disk Imager. It is as simple as inserting the SD card into your computer and selecting the drive letter of the SD card. Then pointing to the Armbian image file and clicking Write. Wait a few minutes for it to complete and Armbian will be flashed! Take the SD card and insert it into the Le Potato to begin the openHAB install.
Obtaining the openHAB Le Potato IP Address
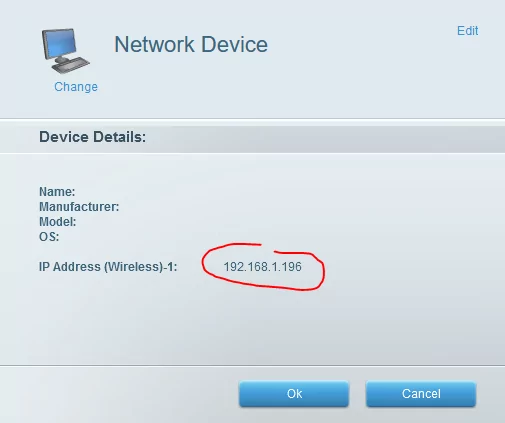
After inserting the micro SD card into your Le Potato, go ahead and connect an Ethernet cable from your router to the Le Potato along with the Le Potato’s power supply. This will turn on the Le Potato and allow us to find the IP address so we can then SSH in and start the first step to install openHAB.
The easiest way is to connect to your router and find the list of devices connected and then find the Le Potato. This will tell you the IP address. For example, on my Linksys router, I navigated to http://192.168.1.1 and found the Le Potato and its IP address.
SSH into the openHAB Le Potato
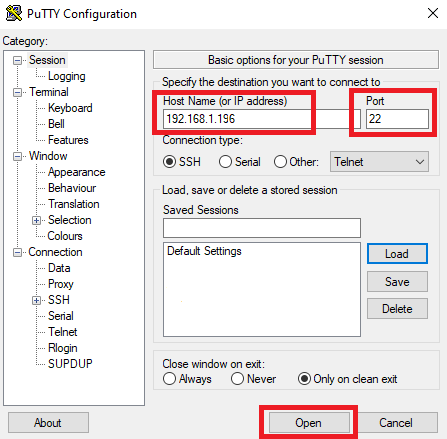
Now that the openHAB Le Potato has been booted up with the Armbian flashed micro SD card and you have obtained the IP address, we will need to SSH into it. This is where Putty comes in. Open up putty and put the Le Potato’s IP address in the Host Name (or IP address) field. Make sure the Port field has 22 entered in it. Click open and then you will be prompted with a popup. Go ahead and click Accept/OK and you will see a command line interface asking you to login. Now the fun begins. On to the second step to install openHAB on the Le Potato!
Step 2: Install openHAB – Initial Armbian Setup
Now that you have established an SSH connection to your Le Potato to install openHAB on, you will first be prompted to login. You will want to use the root account. The credentials to login are root/1234. After the initial login, you will be prompted to change the root user’s password. Be sure to remember whatever password you enter here! Proceed forward until you are asked to create a new user.
login as:root[email protected]'s password:1234Welcome to ARMBIAN!
Documentation: https://docs.armbian.com | Community: https://forum.armbian.com
IP address: 192.168.1.196
Create root password:whatever_password_you_will_rememberCreate root password: ********
Repeat root password:whatever_password_you_will_remember (same as above)Choose default system command shell:
1) bash
2) zsh1After selecting bash as the default system command shell, you will be asked to create a new user. You can chose whatever user/password you’d like, but for the simplicity of this guide, I chose to make the username openhab and the password as openhab as well. I also made Openhab the user account’s real name since that was auto-filled in for me and it made sense. Continue moving forward with the timezone and locale setup.
Shell: BASH

Creating a new user account. Press <Ctrl-C> to abort

Please provide a username (eg. your first name):openhabCreate user (openhab) password:whatever_password_you_will_remember - I went with openhab so it is easy to rememberRepeat user (openhab) password:whatever_password_you_will_remember (same as above)Please provide your real name: Openhab (that should be auto-filled in for you)Dear Openhab, your account openhab has been created and is sudo enabled.
Please use this account for your daily work from now on.
Detected timezone: America/New York
Set user language based on your location? [Y/n]YAt your location, more locales are possible:
1) en_US.UTF-8 4) yi_US.UTF-8
2) eo_US.UTF-8 5) Skip generating locales
3) es_US.UTF-8
Please enter your choice:1Generating locales: en_US.UTF-8 Now that the users, timezone and locale are set up, we will need to update and upgrade apt-get.
sudo apt-get updatesudo apt-get upgradeLet it do its thing as this will take a little while to complete. After it prints out a bunch of lines, it will tell you that it will use xxx kb (or mb) of additional disk space and ask if you want to continue. Type Y and watch it go.
After this operation, 765 kB of additional disk space will be used.
Do you want to continue? [Y/n]YWhile the apt-get upgrade is running, keep an eye on the output. You may see something similar to this output:
Configuration file '/etc/issue'
 ==> Modified (by you or by a script) since installation.
 ==> Package distributor has shipped an updated version.
   What would you like to do about it ?  Your options are:
    Y or I  : install the package maintainer's version
    N or O  : keep your currently-installed version
      D     : show the differences between the versions
      Z     : start a shell to examine the situation
 The default action is to keep your current version.
*** issue (Y/I/N/O/D/Z) [default=N] ?
If this question, or one similar to it is prompted at you, go ahead and type N. I was asked this twice and for both times, answered with N.
NStep 2: Install openHAB – WiFi or Ethernet?
Now that the initial step to install openHAB on Le Potato is complete, you will need to decide how your openHAB home automation system will function. Will you always be using Ethernet? Or do you plan to use WiFi?
If you plan to continue with a hardwired Ethernet connection, proceed forward.
If you want to use WiFi, you will need to follow the steps found on the Linux WiFi Setup Guide. Go ahead and plug in your Linux WiFi dongle and follow those instructions. Once you have completed the WiFi setup, you will need to obtain your Le Potato’s new WiFi IP address and establish a new SSH connection using that IP address. Proceed forward after establishing the new SSH connection and logging in with the openhab user we created during the initial setup.
Step 3: Install openHAB – Armbian Config
This is the second to last step to install openHAB on Le Potato. This is where we will actually install openHAB itself through the Armbian Config menu. Go ahead and enter the following command to continue with the Le Potato openHAB install:
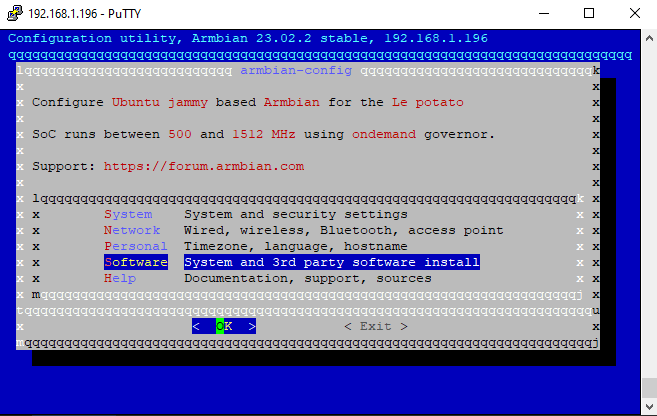
sudo armbian-configAfter running this command, you should see a screen that is similar to the image below. Using your arrow keys to navigate this menu, proceed down to the Software option and press enter on OK.
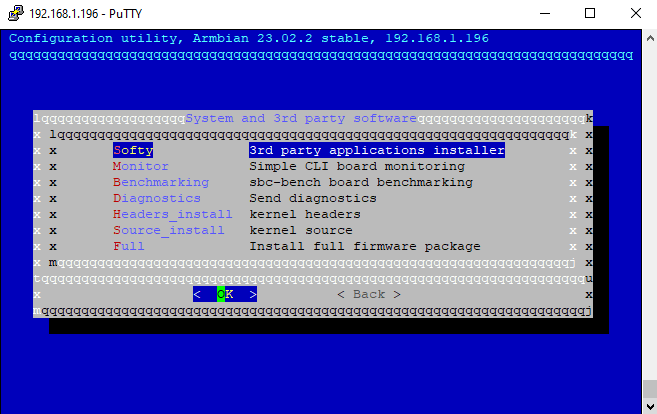
You will briefly see a loading screen and then be presented with another screen of options. On this screen, Softy should be the first option. If it is not, navigate to Softy and press enter on OK. After selecting Softy, you will see a loading screen. For me, this loading screen took about 90 seconds to load. Don’t worry if yours is taking a while to load.
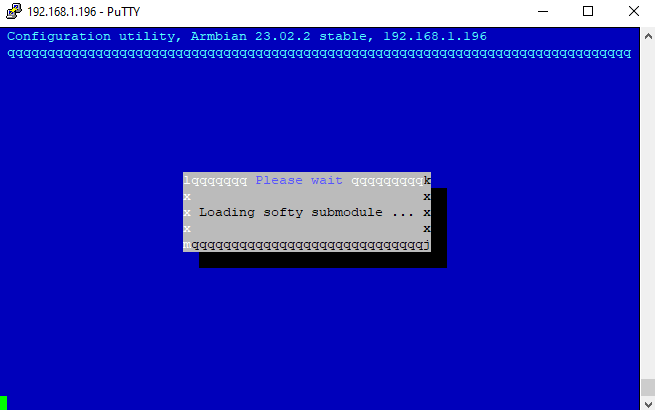
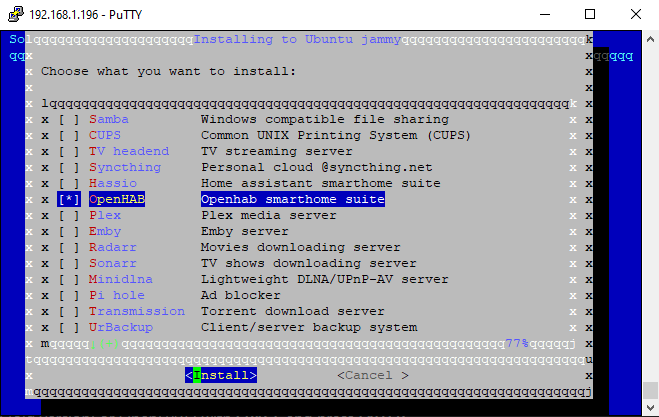
Once Softy finally loads, find OpenHAB on the new set of options and navigate to it with your arrow keys. With OpenHAB highlighted, press your spacebar once so an asterisk is added (as shown below in the image). Then press enter on Install and openHAB will begin to install on your Le Potato!
During the OpenHAB install, you will see a series of ‘Downloading’ and ‘Installing’ screens. Patiently wait for openHAB to finish up; this process will take a few minutes.
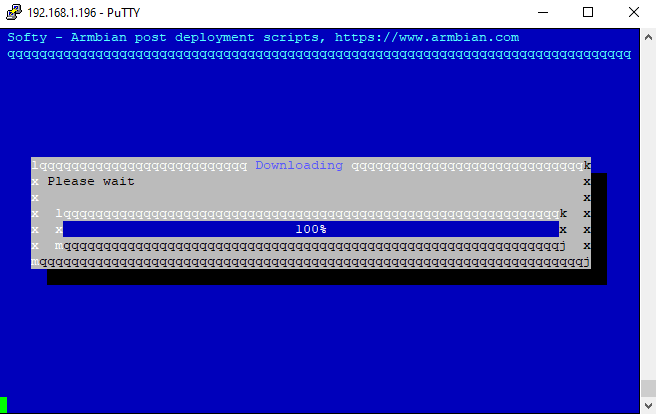
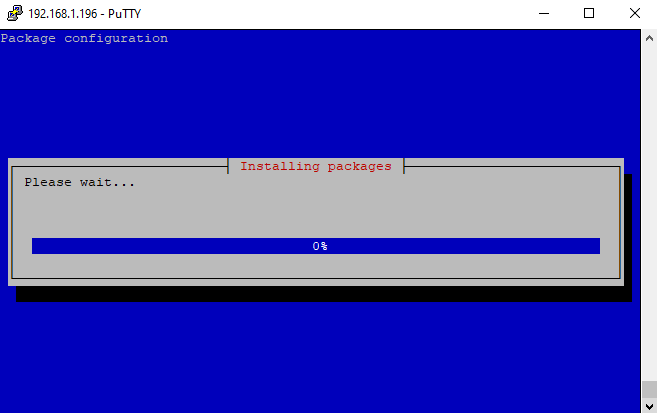
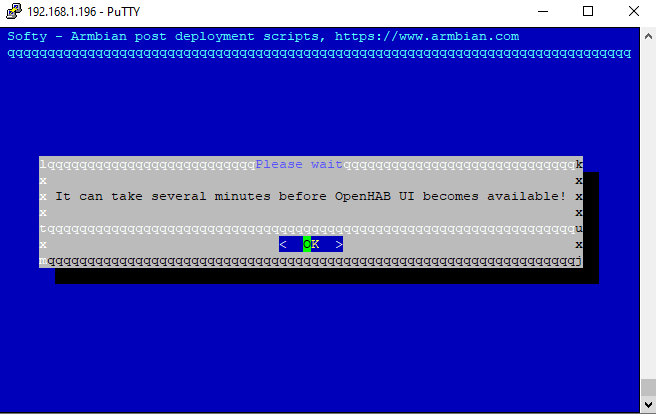
After 5 or so minutes, you will finally see the message that the openHAB UI may take several minutes to load. That is a good sign and that openHAB has officially installed! Go ahead and press enter on OK to leave this config screen and go back to the previous config screen. Using the left arrow, highlight Cancel and press enter. Keep selecting Cancel/Back/Exit until you are back on the regular command line and out of the Armbian Config (the blue and grey screens).
Final Step: Install openHAB – Verify and Launch openHAB
If you’d like to verify that the install was successful while waiting for the UI to become available, go ahead and run the following command and verify that the openHAB status screen displays. If the openHAB status screen displays for you, all is well and the openHAB install went as planned. If the openHAB status screen does not display for you, something went wrong. Start over and double check that you didn’t accidentally miss a step.
sudo htop -u openhab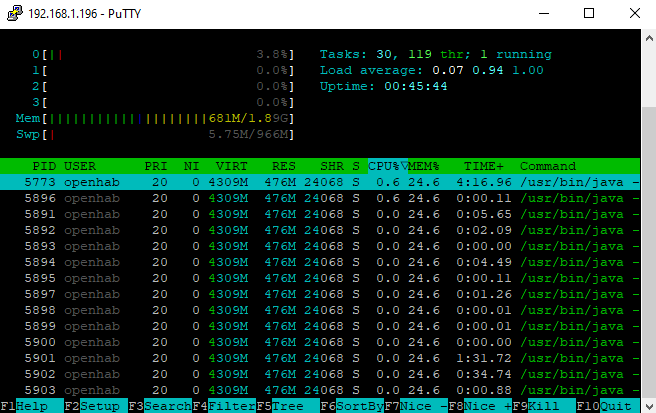
After waiting about 10 minutes, the openHAB UI should be ready. Navigate to http://lepotato:8080 and be presented with the openHAB login screen! If for whatever reason that URL does not work, try http://<YOUR_LE_POTATO_IP_ADDRESS>:8080. For example, mine would be http://192.168.1.196:8080.
Go ahead and set up your openHAB admin user and then run through the setup wizard. Congratulations on completing the Install openHAB Le Potato tutorial!
Install openHAB on Le Potato Wrap Up
I hope this Install openHAB on a Le Potato guide was helpful for you. What smart devices do you plan to use with your openHAB home automation system? I’m always curious to see what other people have planned for their homes. If you need any assistance with installing openHAB using Armbian, let me know in the comments and I’ll be more than happy to help. Thanks for reading and best of luck with your home automation adventures.
You May Also Enjoy




Leave a Reply