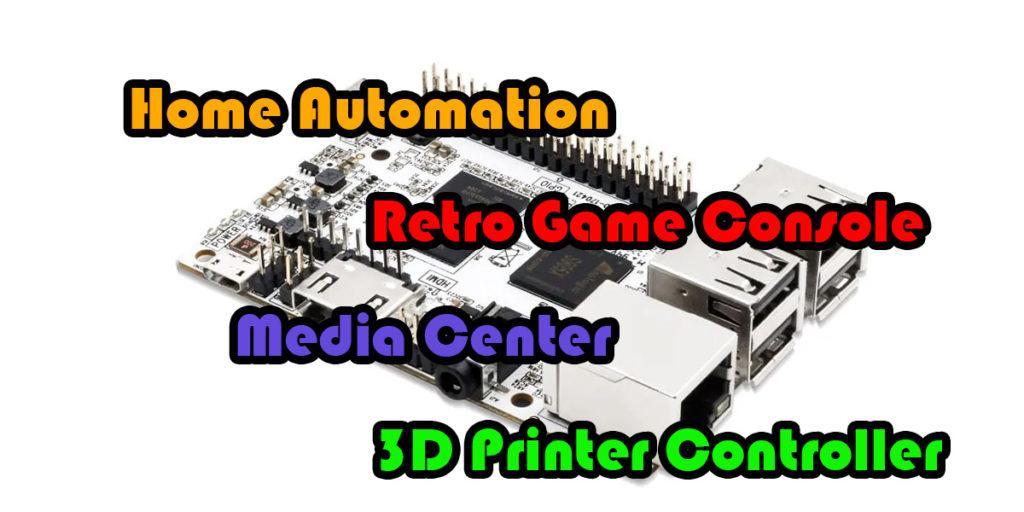
Let your DIY juices flow with some amazing Le Potato projects! Makers rejoice, because the Le Potato is a single-board computer (SBC) that offers a ton of possibilities for creative and exciting projects. In this article, I’ll be sharing 4 unique and great Le Potato projects that combine the power of SBCs along with some great software.
Whether you’re a seasoned maker or just starting out with SBCs, these Le Potato projects are a great way to dive in, head first. These fun DIY projects include home automation, retro gaming, media centers and 3D printer controllers. Let’s jump in with these fun and awesome Le Potato projects!
Table of Contents
This post contains affiliate links, which means I may receive a small commission, at zero cost to you, if you make a purchase through a link.
What is a Le Potato?
The Le Potato is a single board computer (SBCs) made by Libre Computer and is very similar to the Raspberry Pi. Lately, it has become a go-to choice among makers when considering the shortages and price hikes of the Raspberry Pi. Similar to other SBCs, the Le Potato is a compact, credit card-sized board that packs great specs and offers a wide range of applications for DIY projects. The ‘cc’ from the model number literally stands for credit card (AML-S905X-CC).
The Le Potato has an ARM-based processors that comes with a built-in Ethernet port, multiple USB ports, GPIO pins, and other interfaces such as an HDMI port and an SD card slot. It runs on Linux-based operating systems, which provide a familiar environment for developers and makers to work with. The best part about the Le Potato is that they are affordable, readily available to purchase, and flexible.
Another great thing about the Le Potato is that there is an active community for help and support. The Le Potato project ideas we will be discussing today include home automation systems, retro gaming consoles, media centers, and 3D printer controllers. Now, let’s explore these amazing Le Potato projects that you can try out and discover for yourself.
The Le Potato Itself
Before beginning, all of these projects will require the Le Potato (obviously) and a way to power the Le Potato. You may also have a micro SD card laying around, but you will also need one of those as well. Here are all of the minimum required parts:
Additionally, there are a few recommended parts that, while not need, will assist with dissipating heat to improve performance. The last part is a dongle to use WiFi rather than an Ethernet connection:
Alternatively, there is a bundle that includes the Le Potato, USB WiFi Dongle and a Heatsink found here: Le Potato Starter Kit
Le Potato Projects: Home Automation Platforms

Home automation has really taken off in the past few years. Home automation allows homeowners to control and monitor various aspects of their homes with ease. The Le Potato offers a perfect foundation for creating a home automation system that is both affordable and customizable to your specific needs. A home automation system is one of the best Le Potato project ideas to try.
Additionally, you can build you home automation system, piece by piece, over time, rather than buying everything all at once. Being able to gradually add new sensors and devices makes this project idea a top runner.
To begin, one of the coolest parts of home automation is smart lighting. With the Le Potato and a home automation platform, you can create a system that allows you to control your lights remotely, set schedules, and even set different colors for certain occasions or vibes. Imagine being able to turn your lights on or off, or adjust their brightness from anywhere in your home. You can even adjust the lighting remotely from your smartphone.
Another exciting use of home automation is temperature control. You can set up temperature sensors to monitor different rooms of your home and use the Le Potato running the home automation platform to control a smart thermostat to adjust the temperature based on your preferences. This can potentially result in energy savings and a more comfortable home environment.
Security is also another neat segment of home automation. You can connect the Le Potato to various sensors and devices such as motion sensors, door/window sensors, and cameras to monitor your home’s security. Once the sensors and devices are set up, you can then configure alerts or notifications to be sent to your phone or email in case of any suspicious activity.
For those who are new to home automation and want to try a beginner-friendly project with the Le Potato, here is a high-level, step-by-step guide to get you started:
- Parts and supplies:
- Le Potato SBC and parts
- Compatible devices & sensors such as smart lighting, temperature sensors, motion sensors, or cameras
- Install the home automation platform by flashing a micro SD card with the chosen platform’s image. Follow the chosen platform’s documentation for full installation instructions. Any of the following listed platforms are good home automation options that provide a user-friendly interface to configure and manage your home automation system. While Home Assistant my be the most popular, it is quite difficult to install and maintain on a Le Potato. You will need to have extensive Linux experience and be able to troubleshoot issues when they arise. OpenHAB is probably going to be the easiest to install and maintain regularly.
- Home Assistant
- Follow this full guide to get yourself a wonderful Le Potato Home Assistant Setup.
- OpenHAB
- Follow this full How to Install openHAB on Le Potato guide using Armbian for the Le Potato
- Home Assistant
- Connect any sensors and smart devices to your network. Be sure to follow the instructions provided by the sensor or device’s manufacturer for proper installation and setup. Once connected to your network, you can then begin detecting and assigning the sensors and devices in your home automation platform using its UI.
- After setting up the sensors and devices, you can then begin to configure automation rules. Using the selected home automation platform, you can set up rules to turn on the lights when motion is detected, adjust the temperature based on time of day, send alerts when security sensors are triggered, etc.
- Once you have configured your home automation system and the sensors and devices, make sure to test them. This will ensure everything is functioning as expected. Fine-tune the automation rules to fit your lifestyle and habits.
With a little creativity, the Le Potato can be a powerful tool for building your own home automation system. Whether it’s smart lighting, temperature control, security, or other automation projects, the possibilities are nearly endless with the Le Potato as your DIY home automation hub.
Le Potato Project Ideas: Retro Gaming Consoles

Before we begin with the Retro Gaming Le Potato project idea, I must say that I 100% do not endorse piracy. I will not provide or assist with the acquisition of pirated materials such as game files, music files, images, source code, ROMs, etc. For more information on creating your own ROMs from your own game cartridges, take a look here.
Retro gaming has been popular for many years, but “Covid times” really pushed the popularity to become even more massive, somehow. Retro gaming is great because it brings back the nostalgia of playing your favorite video games from your past. But what if your original console no longer works? Or, the picture is super blurry on your modern flat screen TV? That is where the Le Potato comes in. You can build your own retro gaming console using the Le Potato that can play almost all of the old games you remember. Not only that, but you can actually alter the image quality and resolution to get super crisp and clear image quality!
For those who are looking for a fun Le Potato project idea, build yourself an awesome retro gaming console! Here is a high-level, step-by-step guide on how you can do it:
- Parts and supplies
- Le Potato SBC and parts
- Game Controllers such as an 8BitDo Sn30 Pro Controller, Wireless SNES Controllers, etc.
- There are several retro gaming software options available that you can install on your Le Potato. You want to find one that is open-source and has a community that supports it, along with a wide range of retro gaming consoles it can play. The following software options provide a user-friendly interface and have support for various gaming emulators, allowing you to play classic games from NES, SNES, Sega Genesis, and many more. I would recommend EmuELEC for the Le Potato. It will be the easiest to install and get up and running, along with being the newest. RetroPie, for example, is old and outdated for the Le Potato.
- EmuELEC
- Follow this awesome EmuELEC Le Potato Project guide using the Le Potato EmuELEC image
- Lakka
- Le Potato-specific Lakka image can be downloaded here
- Batocera
- Follow this great Batocera Le Potato Project guide using the Le Potato Batocera image
- EmuELEC
- After selecting what retro gaming software you want, you will need to install it for use with the Le Potato. Each platform listed above has documentation to assist with installation. This will involve flashing an operating system or software-specific image on to an SD card and then inserting the SD card into your Le Potato.
- To play retro games on your Le Potato, you’ll need to add game ROMs to your retro gaming software. Once you have dumped your games and created the ROM files, add them to the SD card and begin pointing each system to the correct folder containing your ROM files.
- Next, you’ll need to configure each game console within the retro gaming software. This will involve setting up controllers, configuring graphics, audio settings, etc. This is also where you can start changing settings to upscale and modify the image of games. Each retro gaming software has its own configuration process, so make sure to follow the instructions provided by the software’s documentation.
- Once you’ve installed the retro gaming software, configured it, and added ROMs to each console’s library, you’re ready to enjoy retro gaming on your Le Potato! The Le Potato’s powerful processing capabilities will ensure smooth gameplay as you tap into that nostalgic feeling of playing classic retro games.
Building a retro gaming console with the Le Potato is a fun and exciting project with very little prior knowledge. With its powerful specs and budget price tag, the Le Potato can provide an amazing retro gaming experience, allowing you to play your favorite games from way back when.
Le Potato Projects: Media Centers

Another one of the best Le Potato projects is to build yourself a media center. Nowadays, media consumption has become an integral part of our daily lives. The days of cable TV and Blu-Rays are fading away. Having a custom built media center can enhance your entertainment experience by allowing you to organize, access, and play all of your types of media. It can serve as a central hub for your digital media collection and provide you with a convenient way to access and enjoy your favorite content.
Creating a media center with Le Potato has several benefits:
- Building a custom media center with Le Potato is a cost-effective option when compared to purchasing a retail media center or streaming device.
- With a media center you build, you have full control over the software, settings, and configuration. You can choose from various media center software options, pick and choose various themes, and configure the settings to fit your needs.
- The Le Potato is a versatile SBC that can handle multiple media formats and streaming services with its out-of-the-box specs.
- Having a custom built media center with allows you to access your media content from anywhere in your home. If you have media stored on a Windows machine, for example, you can setup SMB sharing and access that media from the Le Potato, over your network.
As an awesome and relatively simple Le Potato project idea, here are high-level, step-by-step instructions for creating your own media center:
- Parts and supplies:
- Le Potato SBC and parts
- A good quality HDMI cable
- A Bluetooth or USB Remote
- Choose the media center software that best fits your needs, such as:
- Kodi
- Emby
- Download here (you want the Ubuntu Arm64 (aarch64) version)
- Plex
- Follow the installation instructions found here
- You will need Ubuntu or Debian OS
- The Debian image will need to be compiled yourself through a Linux terminal by combining the boot and filesystem images
- Optionally, I have already compiled the Debian image for Le Potato boards and which you can download already compiled
- Similar to the other Le Potato project ideas, you will need to download and install the media center software on your Le Potato by following the software’s official installation instructions. This will involve flashing the software image onto a micro SD card.
- Connect your Le Potato to a TV or monitor using an HDMI cable by using the HDMI output port on your Le Potato to connect it to your TV or monitor’s HDMI input.
- Configure your chosen media center’s software. Documentation for advanced configurations can be found on the software’s website. This is where you will set up your media sources, configuring your library, and apply themes to the UI of your media center.
- Add your media files to the media center software’s library. If you are using Windows operating system and want to stream your media from one device to another, checkout this super simple Creating Windows SMB File Shares guide to quickly set that up.
- Once your media files are added to the libraries, you can start enjoying your favorite movies, TV shows, music, and videos. Fine tune the user experience of the media center software to fit your needs perfectly.
Creating a media center with a Le Potato is a fun and cost-effective project that can enhance your entertainment experience by providing a central hub for organizing, accessing, and enjoying your favorite media content. With its affordability, great specs, and customization options, the Le Potato is an excellent choice for building your custom media center. Also, if you end up choosing Kodi as your media center software, my preferred choice, be sure to check out these Kodi Articles that can help you, if you run into a problem!
Le Potato Project Ideas: 3D Printer Controllers

One of my favorite Le Potato project ideas, and my first Le Potato project ever, is using it as a controller for your 3D printer. 3D printing has revolutionized the world for DIY projects, allowing makers to create intricate, cosmetic, functional and personalized objects from thin air. Using an SBC to control your 3D printer will give you so many more features and quality of life improvements for your printer.
If you want to truly want full control of your 3D printer, then adding a Le Potato to control it is one of the most efficient ways to dit. Here is a high-level, step-by-step guide to get you started on your journey:
- Parts and supplies
- Le Potato SBC and parts
- A good quality USB cable
- Make sure you have a compatible 3D printer with a USB interface. You will need to connect the Le Potato to your 3D printer’s controller board using a USB cable. Be sure to follow the software’s installation instructions, because those instructions will tell you specifically when to connect your 3D printer to the Le Potato.
- Chose which software you want to install. These will essentially take control over your 3D printer bypassing the printer’s built in screen/menu functionality. The installation process will involve flashing a micro SD card with a recommended flavor of Linux and then installing the chosen software there. If you end up choosing OctoPrint, I have a full OctoPrint step-by-step guide that will walk you through the process, from start to finish, including all command line steps. Good software choices are:
- OctoPrint
- Follow these instructions for Installing OctoPrint on a 3D Printer.
- Klipper
- Follow these installation instructions
- You will need to have OctoPrint installed before hand, so install that first, mentioned above
- Repetier-Server
- Follow the installation instructions under ‘Debian Installation’
- You will need Debian OS
- The Debian image will need to be compiled yourself through a Linux terminal by combining the boot and filesystem images
- Optionally, I have already compiled the Debian image for Le Potato boards and which you can download already compiled
- OctoPrint
- Once you have installed the 3D print software of your choice, you can begin configuring the software to fill your needs. Using any of these software choices, you will be able control your 3D printer through a web browser, remotely. You can upload your GCODE and send them to your printer and start printing right away. You can also monitor the progress of your prints, control the printer’s temperature, and receive notifications when the print is complete.
- Once you get the hang of your chosen 3D printing software, you can begin really customizing it to your heart’s content. This includes changing themes, adding a webcam, installing plugins, and more. Again, if you end up going with OctoPrint, I have a guide with the 10 Best OctoPrint Plugins to Install you can reference.
Using a Le Potato as a controller for your 3D printer opens up a world of possibilities for customization, optimization and adding new features to your printer. With software options such as OctoPrint, Klipper, and Repetier-Server, you can remotely control and monitor your printer, customize your prints, and achieve professional-quality results.
Final Thoughts
Single-board computers have really changed the world by offering affordable boards with powerful specs and (for the most part) accessibility to all. Together, we explored 4 different Le Potato project ideas, but there are so many more uses for this little board. Just off the top of my head, you can use the Le Potato to create robotics, weather stations, gardening monitors, a Pi-Hole device, a workshop desktop PC, etc. Let me know what Le Potato projects you have been working on or if you’d like me to cover any specific Le Potato projects in the future.
You May Also Enjoy







Leave a Reply